
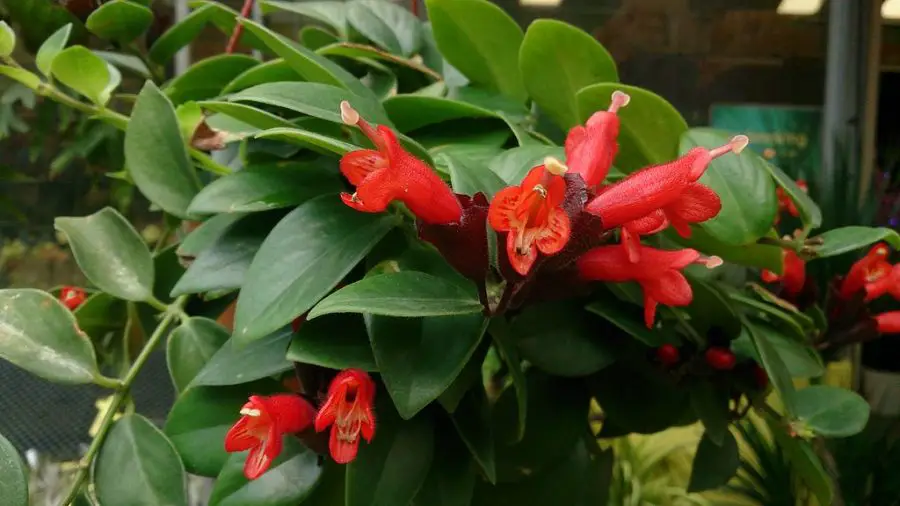
Lipstick plant care indoors is easier than many growers expect once you understand what this tropical trailing plant needs to thrive. Known for its glossy vines and bright tube-shaped blooms, the Lipstick Plant (Aeschynanthus) makes an excellent hanging basket or shelf plant for indoor spaces.
These tropical epiphytes naturally grow in warm, humid forests where they cling to trees and enjoy filtered light, steady moisture, and strong airflow. Recreating those conditions indoors helps encourage fuller growth and more frequent flowering.
This guide covers everything you need to know about lipstick plant care indoors, including light, watering, humidity, soil, repotting, propagation, and fixing common growing problems.
What You’ll Learn
- How much light lipstick plants need for healthy blooms
- The best watering and humidity routine
- How to build the ideal coco coir and perlite soil mix
- How and when to fertilize for better flowering
- How to repot and propagate lipstick plants
- Common lipstick plant problems and how to fix them
- The best indoor locations for trailing growth
Quick Answer: Lipstick Plant Care Indoors
Lipstick plants grow best in bright indirect light, warm temperatures between 65°F and 80°F, and moderate to high humidity. Water when the top inch of soil feels dry, use a loose well-draining mix with coco coir and perlite, and feed monthly during active growth for stronger flowering.
Introduction: Lipstick Plant Care Indoors

In this comprehensive guide, we’ll explore everything from the different types of lipstick plants to their specific care requirements, such as lighting, watering, and even pest control.
By the end of this post, you’ll be armed with all the knowledge you need to help your lipstick plant flourish and bring a burst of color to your home.
Overview of lipstick plants and their unique features
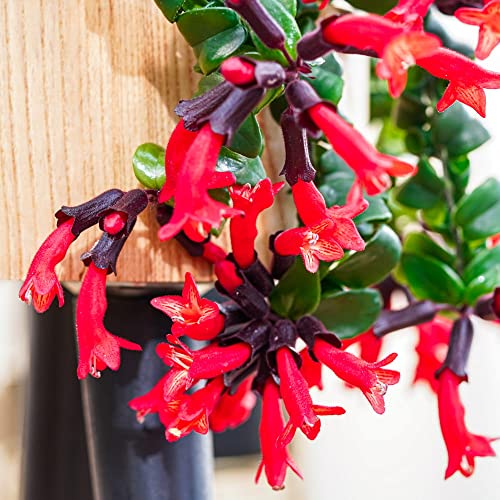
Lipstick plants, belonging to the Aeschynanthus genus, are eye-catching tropical plants known for their striking, tubular flowers that resemble a tube of lipstick.

These beautiful plants boast a variety of vibrant colors, including red, orange, and even purple, making them a dazzling addition to any indoor space.
Their native habitat is the humid rainforests of Asia. Lipstick plants are epiphytes, meaning they often grow on other plants and trees, absorbing nutrients and moisture from their surroundings.
Importance of proper indoor care for lipstick plants
Given their tropical origins, it’s essential to provide proper indoor care for lipstick plants to ensure they thrive and bloom.
When given the right conditions, these stunning plants can be a low-maintenance and rewarding addition to your indoor garden.
Finding the Right Temperature and Humidity for Lipstick Plants
Lipstick plants, being native to tropical rainforests, thrive in warm temperatures and high humidity levels.
To keep your lipstick plant happy, aim for a temperature range of 65-80°F (18-27°C) during the day and slightly cooler temperatures at night, around 60-65°F (15-18°C).
It’s crucial to avoid exposing your tropical plant to temperatures below 50°F (10°C), as this can cause stress and damage.
In addition to warmth, lipstick plants love humidity. To replicate their natural environment, maintain a humidity level of around 50-60% or even higher.
You can easily achieve these humid conditions by placing a pebble tray filled with water and pebbles underneath the plant’s pot, using a humidifier, or regularly misting the plant with water.
Just make sure the foliage doesn’t stay wet for too long to prevent fungal issues.
Promoting Good Airflow for Healthy Lipstick Plants
While it might not be the first thing that comes to mind when considering plant care, proper airflow is essential for lipstick plants.
Good air circulation helps prevent the buildup of moisture, which can lead to mold, mildew, and other fungal issues.
It also aids in maintaining a consistent temperature and humidity level around your plant.
To ensure your lipstick plant enjoys adequate airflow, avoid placing it in a tight corner or a spot where the air is stagnant.
Instead, choose an area where there’s a gentle movement of air, like near a window or an open room.
You can also use a small fan on a low setting to encourage air circulation but be cautious not to point it directly at the plant, as this may cause the leaves to dry out.
Lipstick Plant Succulent

In this section, we’ll take a closer look at the characteristics of succulent lipstick plants and share some essential tips for nurturing these delightful indoor plants.
Discovering the Unique Traits of Succulent Lipstick Plants

Succulent lipstick plants are a fascinating subset of the Aeschynanthus genus, distinguished by their fleshy, water-storing leaves.
These intriguing plants share many of the same captivating floral features as their non-succulent counterparts, such as their vibrant, tubular flowers.
One popular example is the Aeschynanthus marmoratus or the zebra basket vine, which sports stunning marbled leaves and bright red flowers.
The succulent nature of these plants allows them to withstand periods of drought, making them more forgiving when it comes to watering compared to other lipstick plant varieties.
However, they still require proper care and attention to thrive indoors.
Essential Tips for Nurturing Succulent Lipstick Plants Indoors
• Watering: Although succulent lipstick plants can tolerate some drought, it’s important not to let them dry out completely.
Water your plant thoroughly, allowing the excess water to drain away. Wait for the top inch or two of the soil to dry out before watering again.
Avoid giving your plants too much water as it can cause overwatering and can lead to root rot, so be mindful not to leave your plant sitting in standing water.
• Light: Just like other lipstick plants, succulent varieties appreciate indirect bright light.
Keep them near a well-lit window, but protect them from harsh, direct sunlight that can cause leaf scorching.
• Soil: A well-draining soil mix is essential for succulent lipstick plants to prevent root rot.
Use coco coir and perlite or combine a succulent or cactus mix with perlite or pumice to increase drainage and aeration.
• Humidity: Although succulent lipstick plants can handle lower humidity levels compared to other varieties, they still appreciate some extra moisture in the air.
Mist your plant occasionally or use a humidity tray to provide a more comfortable environment.
• Fertilizing: During the growing season (spring and summer), feed your succulent lipstick plant with a balanced, water-soluble fertilizer diluted to half strength, applying it every 4-6 weeks.
You can also opt for a slow-release fertilizer to reduce frequent fertilizing. Reduce or stop fertilizing during the dormant winter months.
Types of Lipstick Plants
Ready to explore the diverse world of lipstick plants?
These stunning beauties come in a variety of shapes, sizes, and colors, each with its own unique charm.
In this section, we’ll introduce you to some of the most popular lipstick plant types, from the classic Aeschynanthus radicans to the striking Black Pagoda variety.
So, let’s embark on this exciting journey together and discover the alluring array of lipstick plants that could soon be brightening up your indoor garden!
Aeschynanthus radicans: The Classic Lipstick Plant

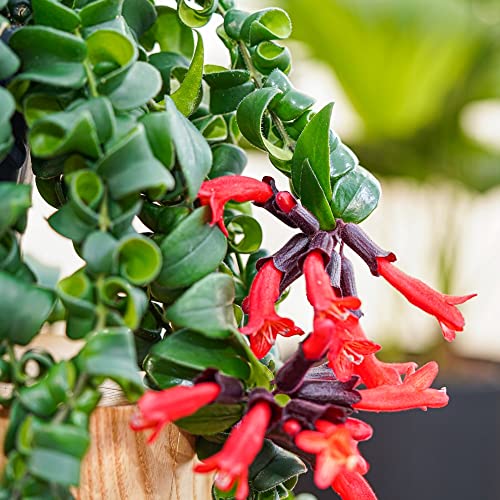
Also known by the common name lipstick plant, Aeschynanthus radicans is a crowd favorite, featuring trailing vines with glossy, dark green leaves and brilliant red, tubular flowers.
This variety is perfect for hanging baskets, where its stunning cascading growth can be showcased.
With proper care, including bright indirect light and consistent watering, Aeschynanthus radicans will reward you with a profusion of vibrant blooms.
Aeschynanthus lobbianus
Aeschynanthus lobbianus, commonly referred to as the goldfish plant, boasts elongated, tubular flowers that resemble the shape of a goldfish.
These striking blooms come in various shades, from bright red to coral and even yellow.
This variety also has glossy green leaves and trailing vines, making it an ideal choice for a hanging basket or a high shelf.
Provide your Aeschynanthus lobbianus with plenty of bright, indirect light and regular watering to keep it happy and blooming.
Other Popular Lipstick Plant Varieties
There are numerous other lipstick plant varieties to explore, each with its distinct characteristics and charm. Some other popular options include:
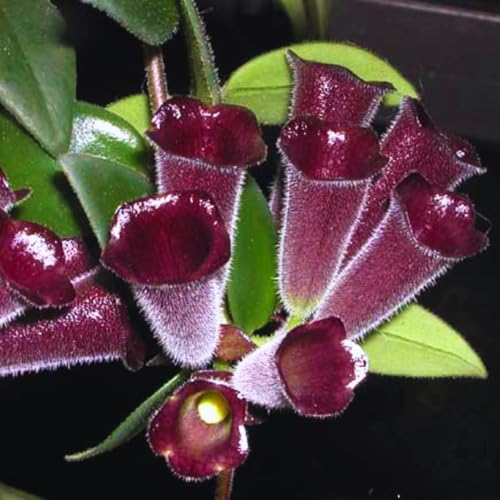
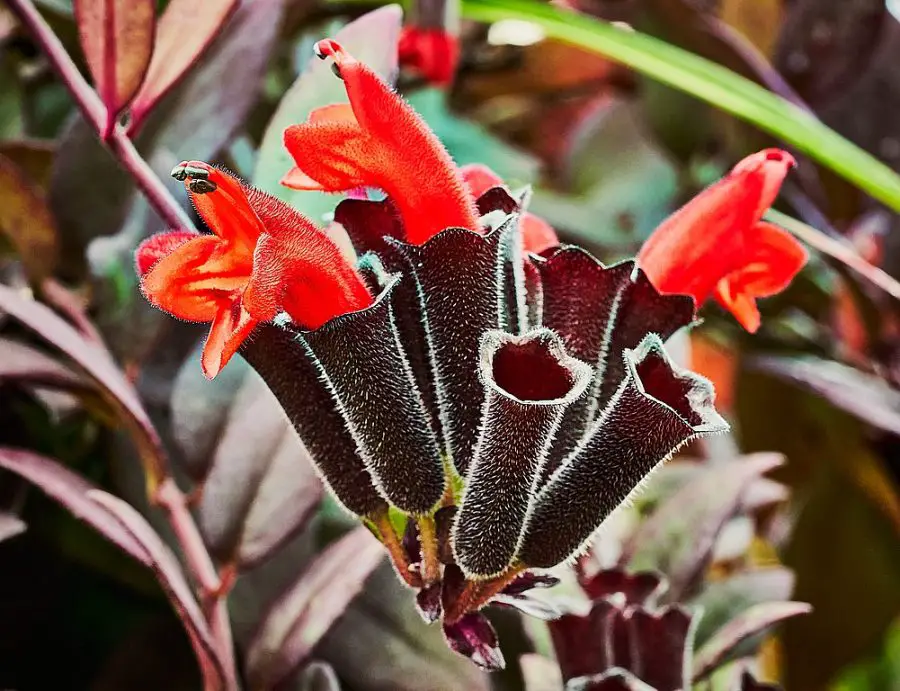
Aeschynanthus ‘Black Pagoda’: A variety with dark, almost black leaves featuring pink stripes and red flowers.
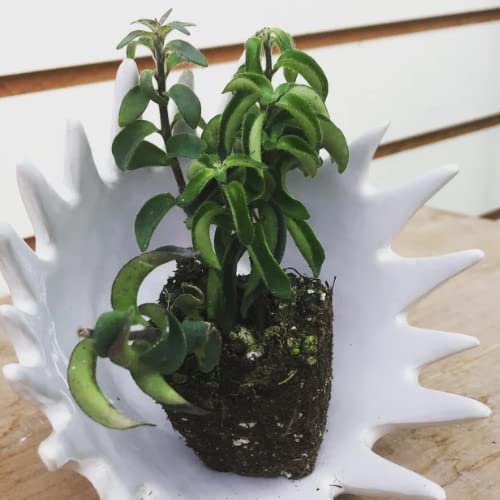
Aeschynanthus ‘Curly’: Known for its curly, twisted leaves and vibrant orange-red blooms.
Aeschynanthus ‘Rasta’: A unique variety with twisted, dense foliage and bright red flowers.
With so many captivating lipstick plant varieties to choose from, you’re sure to find the perfect match for your indoor garden.
Remember to tailor your care routine to the specific needs of your chosen variety, and you’ll be rewarded with a dazzling display of color and foliage.
Temperature and Humidity
In this section, we’ll discuss the ideal temperature and humidity levels for your lipstick plant, as well as tips for maintaining these conditions indoors.
Finding the Sweet Spot: Ideal Temperature for Lipstick Plants
Lipstick plants prefer temperatures ranging from 65°F to 80°F (18°C to 27°C) during the day, and slightly cooler temperatures around 60°F (15°C) at night.
These tropical plants can be sensitive to extreme temperature fluctuations, so it’s important to keep them away from cold drafts, air vents, or direct heat sources that could cause sudden changes.
Avoid cold temperatures below 50
Ideal Humidity for Lipstick Plants
As native plants of tropical rainforests, lipstick plants thrive in environments with higher humidity levels.
Ideally, they prefer a humidity level of around 50-70%. To maintain adequate humidity for your lipstick plant indoors, you can try the following methods:
• Humidity tray: Place a tray filled with water and pebbles beneath your lipstick plant’s pot, ensuring the pot is elevated on the pebbles and not sitting in the water. As the water evaporates, it will create a more humid microclimate around the plant.
• Group plants together: Placing multiple plants close together can increase the humidity in their immediate vicinity, as they release moisture through a process called transpiration.
• Use a humidifier: A room humidifier can help you maintain consistent humidity levels in the area where your lipstick plant is located.
• Mist your plant: Regularly misting your lipstick plant with water can help increase humidity, but be cautious not to overdo it, as excessive moisture on the leaves could lead to fungal issues.
Lipstick Plant Lighting

In this section, we’ll shed some light (pun intended) on the ideal lighting conditions for your lipstick plant and offer tips on how to achieve the perfect balance for a happy, healthy plant.
Ideal Light Conditions for Lipstick Plants
Lipstick plants thrive in bright, indirect light, which is essential for their healthy growth and the production of their vibrant, tubular flowers.
These tropical beauties prefer dappled sunlight, similar to what they would receive under the rainforest canopy in their natural habitat.
It’s important to provide your lipstick plant with enough light, as insufficient lighting can lead to poor growth, leggy stems, and a lack of blooms.
Bright Ideas for Providing Adequate Light Indoors
To ensure your lipstick plant receives the optimal lighting conditions indoors, choose a bright spot by following these tips:
• Windowsill wisdom: Place your lipstick plant near a well-lit window that receives indirect sunlight, such as an east or west-facing window.
Avoid direct sunlight, especially during the intense midday hours, as it can scorch the leaves.
• Filter the light: If your plant is exposed to direct sunlight, use a sheer curtain or blinds to filter the light and protect the leaves from damage.
• Rotate for even growth: Rotate your plant every few weeks to ensure all sides receive equal exposure to light.
This promotes even growth and prevents your plant from becoming lopsided.
• Artificial lighting: If you’re lacking sufficient natural light, consider using artificial grow lights to supplement your plant’s lighting needs.
LED or fluorescent lights work well, providing your lipstick plant with the necessary light spectrum for healthy growth and flowering.
Best Indoor Locations For Lipstick Plants
Lipstick plants perform best when placed where they can trail naturally while receiving bright filtered light.
- East-facing windows with morning light
- Bright bathrooms with higher humidity
- Plant shelves near bright windows
- Hanging baskets in bright living rooms
- Warm kitchens with indirect sunlight
Avoid dark corners, harsh direct sun, or areas with dry heating vents.
Fertilizing Lipstick Plants

In this section, we’ll discuss the importance of fertilizing your lipstick plant, the types of fertilizers best suited for the job, and tips on how to apply them effectively.
Picking the Perfect Fertilizer for Your Lipstick Plant
Choosing the right fertilizer is key to supporting the health and growth of your lipstick plant.
A balanced, water-soluble fertilizer with equal parts nitrogen (N), phosphorus (P), and potassium (K) is ideal for these vibrant beauties.
Look for a formula with a 20-20-20 or 15-15-15 NPK ratio, which will provide your plant with essential nutrients for strong growth, vibrant foliage, and plentiful blooms.
How Often to Fertilize Lipstick Plants
When it comes to fertilizing your lipstick plant, the frequency and timing can make all the difference. Follow these guidelines to keep your plant well-fed and thriving:
• Growing season: During the active growing months of spring and summer, fertilize your lipstick plant every 4-6 weeks. This will provide the necessary nutrients for optimal growth and flowering.
• Dilution: To prevent over-fertilizing and potential damage to your plant, dilute the fertilizer to half strength, following the package instructions for proper mixing ratios.
• Winter dormancy: As your lipstick plant’s growth slows down during the cooler months, it’s essential to reduce or stop fertilizing altogether. Resume fertilizing when you notice new growth in the spring.
Watering Lipstick Plant

In this section, we’ll guide you through the process, sharing valuable tips and insights on how to water your lipstick plant just right.
The Ideal Watering Schedule for Your Lipstick Plant
Determining the right watering schedule for your lipstick plant is essential to maintaining its health and vitality.
These tropical plants enjoy consistent moisture but also need well-draining soil to prevent waterlogged roots.
To strike the perfect balance, follow these guidelines:
• Monitor the soil: Allow the top inch of soil to dry out slightly between waterings. You can check the soil moisture by sticking your finger into the soil or using a moisture meter.
• Adjust to the environment: Your lipstick plant’s watering needs may change depending on the season, temperature, and humidity levels. Be prepared to adjust your watering frequency accordingly.
• Observe your plant: Keep an eye on your lipstick plant for signs of over or underwatering, such as yellowing leaves, wilting, or root rot. Adjust your watering schedule as needed to address any issues.
Tips for Proper Lipstick Plant Watering
To keep your lipstick plant well-hydrated and healthy, follow these helpful watering tips:
• Use room-temperature water: Cold water can shock your plant’s roots, so it’s best to use room-temperature water when hydrating your lipstick plant.
• Water deeply and evenly: Thoroughly soak the soil until water drains out of the bottom of the pot. This ensures the root system receives adequate moisture, encouraging healthy growth.
• Drainage is key: Make sure your plant’s container has drainage holes to prevent standing water, which can lead to root rot.
• Bottom watering (optional): For a more thorough watering, try bottom watering by placing the pot in a tray filled with water.
The soil will absorb the water through the drainage holes, ensuring even moisture distribution. Remove the pot from the tray once the soil is sufficiently moist.
Lipstick Plant Soil with Coco Coir and Perlite

The right soil mix can make all the difference in your plant’s overall health and happiness.
In this section, we’ll explore the benefits of using a lipstick plant soil mix containing coco coir and perlite, two fantastic ingredients that help create the perfect environment for your plant to thrive.
Benefits of Using Coco Coir and Perlite in the Soil Mix
Incorporating coco coir and perlite into your lipstick plant’s soil mix provides a range of benefits that contribute to the overall well-being of your plant:
• Improved drainage: Both coco coir and perlite enhance soil drainage, preventing waterlogged roots and reducing the risk of root rot.
• Aeration: Perlite is a lightweight, porous material that increases soil aeration, ensuring your lipstick plant’s roots have access to the oxygen they need to thrive.
• Moisture retention: Coco coir is excellent at retaining moisture while still allowing excess water to drain away. This helps maintain consistent moisture levels, which lipstick plants love.
• Sustainability: Coco coir is an eco-friendly, renewable resource, making it a sustainable choice for your lipstick plant’s soil mix.
Peat moss on the other hand is strip-mined from bogs destroying wetlands and releasing large amounts of co2.
Most potting soil contains sphagnum peat moss. For this reason, I won’t use it and I recommend you don’t either.
How to Create the Perfect Soil Mix with Coco Coir and Perlite
Lipstick plants grow best in a loose, airy soil mix that holds moisture without staying soggy. Since they naturally grow as epiphytes in tropical forests, their roots need both airflow and fast drainage.
A simple and effective mix is:
- 70% coco coir for moisture retention and root-friendly structure
- 30% perlite for drainage and oxygen flow
Coco coir helps keep the roots evenly moist without becoming compacted, while perlite creates air pockets that prevent root rot and improve drainage. This combination mimics the light, breathable growing conditions lipstick plants prefer.
Use this mix in a pot with drainage holes so excess water can escape easily. A hanging basket or lightweight plastic pot works especially well since lipstick plants like slightly snug roots and trailing growth.
This coco coir and perlite blend gives your lipstick plant the balance of moisture, drainage, and aeration it needs for healthy roots, lush vines, and better flowering.
Lipstick Plant Pots
In this section, we’ll cover the factors you should consider when selecting the perfect pot for your plant, from size and material to drainage and aesthetics.
Choosing the Right Size and Material for Lipstick Plant Pots
Selecting the right size and material for your lipstick plant’s pot is crucial for its health and happiness. Consider the following factors when making your choice:
Size matters: Choose a pot that’s slightly larger than your lipstick plant’s root ball, allowing for ample space for root growth.
A pot that’s too small can stunt growth and cause the plant to become root-bound, while an overly large pot may retain too much moisture, leading to root rot.
Material considerations: Lipstick plants thrive in pots made from various materials, such as plastic, ceramic, or terracotta. Each material has its advantages and drawbacks:
Plastic pots are lightweight, affordable, and retain moisture well. However, they may become brittle over time and offer less insulation against temperature fluctuations.
Ceramic pots are visually appealing, offer good insulation, and provide stability for top-heavy plants. They can be heavier and more fragile than other options, though.
Terracotta pots are porous, which allows for excellent airflow and drainage. This can help prevent root rot, but it also means you may need to water more frequently as the soil dries out faster.
Proper Drainage and Pot Placement
Ensuring proper drainage is essential for maintaining a healthy lipstick plant. Here are some tips for achieving the right balance:
Drainage holes are a must: Choose a pot with drainage holes at the bottom to allow excess water to escape, preventing waterlogged roots and root rot.
Saucer support: Place a saucer beneath your pot to catch any excess water that drains out, protecting your surfaces from damage. Be sure to empty the saucer regularly to avoid standing water, which can lead to root rot.
Elevate if needed: If your pot doesn’t have drainage holes, and you cant drill some consider placing a layer of pebbles or small stones at the bottom of the pot to create a reservoir for excess water.
Alternatively, use a pot with drainage holes and place it inside a decorative outer pot without holes.
By selecting the right pot size and material and ensuring proper drainage, you’ll create a comfortable home for your lipstick plant, encouraging healthy growth and a stunning display of foliage and flowers.
Repotting

In this section, we’ll guide you through the repotting process, offering tips and tricks to make this transition as smooth as possible for both you and your plant.
When and Why to Repot Lipstick Plants
Understanding when and why to repot your lipstick plant is essential to keep it thriving. Here are some key indicators that it’s time for a change:
Root-bound: If you notice roots growing out of the drainage holes or circling the surface of the soil, your plant is likely root-bound and needs a larger pot to accommodate its growth.
Slow growth: If your lipstick plant appears to be growing more slowly than usual, it may be a sign that it’s running out of space or nutrients in its current pot.
Every 2-3 years: As a general rule, it’s a good idea to repot your lipstick plant every 2-3 years to refresh the soil and provide more space for root development.
Step-by-Step Repotting Guide
Follow this step-by-step guide to repot your lipstick plant with ease:
• Choose the right pot: Select a new pot that’s 1-2 inches larger in diameter than the current pot, ensuring it has drainage holes.
• Prepare the new soil mix: Create a fresh soil mix using the coco coir, perlite, or the potting mix blend we discussed earlier in this post.
• Remove the plant: Carefully remove your lipstick plant from its current pot by gently tapping the sides to loosen the soil and roots. Hold the base of the plant and gently slide it out.
• Inspect and trim: Examine the root system for any signs of rot or damage, and trim away any unhealthy roots with clean pruning shears.
• Fill the new pot: Add a layer of the fresh soil mix to the bottom of the new pot, and position your lipstick plant in the center.
• Add more soil: Gently fill in the spaces around the plant with the remaining soil mix, ensuring the roots are covered and the plant is secure. Leave about an inch of space from the soil surface to the rim of the pot for easier watering.
• Water thoroughly: Water your newly repotted lipstick plant to settle the soil and help the roots establish in their new home.
By repotting your lipstick plant when needed and following these steps, you’ll support its continued growth and create an even more vibrant, flourishing indoor display.
Lipstick Plant Propagation
In this section, we’ll walk you through the process of lipstick plant propagation, discussing the best methods and offering helpful tips to ensure success.
Various Propagation Methods
Lipstick plants can be propagated using several methods, each with its own unique advantages. Let’s explore some of the most popular techniques:
Stem cuttings: The most common method for propagating lipstick plants, stem cuttings involve taking a section of the plant’s stem, allowing it to root, and then planting it in the soil.
This method usually yields high success rates and is relatively simple to perform.
Layering: Another approach is layering, which involves encouraging roots to grow on a stem while it’s still attached to the parent plant.
Once roots form, the new plant can be separated and planted independently.
Division: For mature lipstick plants, division can be an effective way to propagate. This method involves separating a portion of the plant’s root system, along with its attached stems and leaves, and planting it in a new pot.
Tips for Successful Propagation
To maximize your chances of successful lipstick plant propagation, follow these helpful tips:
• Timing: The best time to propagate lipstick plants is during their active growing season, typically spring or early summer.
• Select healthy material: Choose strong, healthy stems for cuttings or divisions to give your new plant the best chance of thriving.
• Use a rooting hormone: To encourage faster root development, dip the cut end of your stem cutting into a rooting hormone before planting it in a suitable potting mix.
• Provide optimal conditions: Make sure your newly propagated lipstick plant has access to bright, indirect light and consistent moisture levels as it establishes itself.
• Be patient: Propagation can take time, so be patient and give your new plant several weeks to grow roots and establish itself.
By exploring different propagation methods and following these tips, you’ll soon be able to multiply your lipstick plant collection and share the beauty of these captivating plants with others.
Pest Control, Insects, Diseases, and Treatment

Just like any other living thing, lipstick plants can sometimes face challenges from pests, insects, and diseases.
In this section, we’ll discuss common issues that may affect your lipstick plant, as well as tips for identifying, treating, and preventing these problems.
Common Pests and Diseases Affecting Lipstick Plants
Even with the best care, lipstick plants can sometimes fall prey to common pests and diseases. Keep an eye out for these potential threats:
Aphids: These small, sap-sucking insects can cause distorted leaves and a decline in plant health. They often leave behind a sticky residue called honeydew, which can attract other pests and lead to sooty mold.
Spider mites: These tiny arachnids can cause stippling or yellowing of leaves, as well as fine webbing on the undersides of leaves and at stem joints.
Mealybugs: Small, cotton-like insects that feed on plant sap, mealybugs can cause wilting and stunted growth in lipstick plants.
Root rot: Overwatering can lead to root rot, a fungal disease that causes roots to turn brown, and mushy, and emit a foul smell.
Prevention and Treatment Methods
To keep your lipstick plant healthy and pest-free, follow these prevention and treatment tips:
Maintain good plant hygiene: Regularly inspect your lipstick plant for signs of pests or disease, and promptly remove any affected leaves or stems.
Use insecticidal soap or neem oil: For mild infestations, treat your lipstick plant with insecticidal soap or neem oil, following the label directions for application and frequency.
Introduce beneficial insects: Releasing natural predators, such as ladybugs or lacewings, can help control aphids and other pests in an eco-friendly way.
Adjust watering practices: To prevent root rot, which can cause leaf drop and ensure proper drainage and avoid overwatering by allowing the top inch of soil to dry out between waterings.
Isolate affected plants: If you notice pests or diseases on your lipstick plant, move it away from other plants to prevent the issue from spreading.
By staying vigilant and acting quickly to address any issues, you can help your lipstick plant overcome pests and diseases, ensuring it remains a vibrant and eye-catching addition to your indoor garden.
Common Lipstick Plant Problems
Why Is My Lipstick Plant Dropping Leaves?
Leaf drop is often caused by inconsistent watering, cold drafts, or sudden temperature changes.
Why Is My Lipstick Plant Not Blooming?
Lack of flowers usually means insufficient light or too much nitrogen fertilizer.
Why Are The Leaves Turning Yellow?
Yellowing leaves usually point to overwatering or poor drainage.
Why Are The Leaf Tips Brown?
Brown tips are commonly caused by low humidity, dry soil, or mineral buildup.
Why Are The Vines Leggy?
Leggy growth usually means the plant needs brighter light or pruning to encourage branching.
Lipstick Plant Care Indoors FAQs
How often should I water a lipstick plant?
Water when the top inch of soil feels dry. This is usually once every 7 to 10 days depending on humidity and temperature.
Do lipstick plants like humidity?
Yes. They prefer humidity between 50% and 70%, which helps support healthy foliage and flowering.
Why is my lipstick plant not flowering?
Insufficient light is the most common cause. Move it to brighter indirect light and avoid overfeeding nitrogen.
Can lipstick plants grow in hanging baskets?
Yes. Their trailing growth habit makes hanging baskets one of the best ways to grow them indoors.
How often should I repot a lipstick plant?
Repot every two to three years or when roots start circling the pot heavily.
Lipstick Plant Care Indoors Final Thoughts

Lipstick plants are one of the best trailing tropical houseplants for growers who want bright flowers and lush vines without complicated care. Their unique blooms and hanging growth habit make them standout indoor plants.
Give them bright indirect light, steady moisture, decent humidity, and a loose airy soil mix, and they can reward you with strong growth and colorful blooms for years.
Want to transform your indoor space into a lush, thriving haven? These guides will help you master houseplant care with ease.
🌿 Indoor Houseplant Care Guides
- ♻️ Composting Indoors
- 🌳 Rubber Plant Care Indoors
- 🌸 Peace Lily Care Indoors
- 🧀 Swiss Cheese Plant Care
- 🎋 Indoor Bamboo Guide
- 🌱 Vertical Gardening Indoors
- 🌺 Bromeliad Care
- 🥢 Bamboo Plant Indoor Care
- ❤️ Anthurium Care Indoors
- 🌵 How to Grow Succulent Plants
- 🌿 Maidenhair Fern Indoor Care
- See all articles in our Houseplants category