
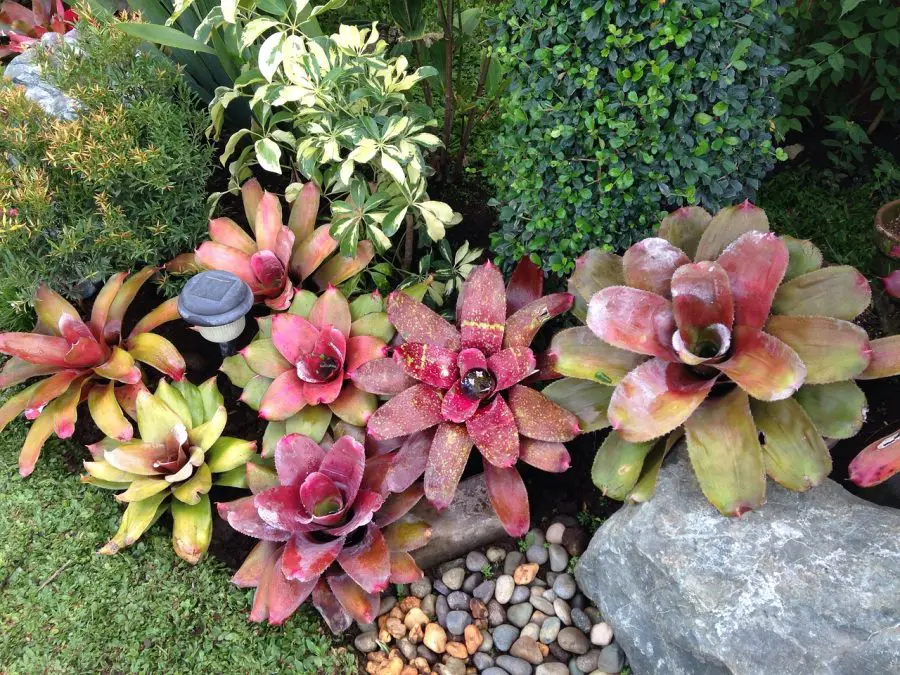
Bromeliad care indoors is surprisingly easy once you understand how these tropical plants grow.
Most bromeliads prefer bright indirect light, light watering, good airflow, and a fast-draining potting mix.
With the right setup, they can thrive indoors for years while adding bold color and tropical foliage to your home.
This guide covers everything you need to know about indoor bromeliad care, including watering, lighting, potting mixes, humidity, propagation, and common mistakes to avoid.
What You’ll Learn
- How to care for bromeliads indoors step by step
- The best light, watering, and humidity setup
- How to prevent rot and common bromeliad problems
- How bromeliads bloom, produce pups, and continue growing
- Whether bromeliads work better mounted or in pots
Understanding Bromeliads
Bromeliads are tropical plants known for their colorful foliage, unusual growth habits, and low-maintenance indoor care requirements.
There are more than 3,000 species of bromeliads, ranging from decorative houseplants to air plants like Tillandsia. Some grow in soil while others naturally attach themselves to trees, branches, or rocks in humid tropical environments.
Most indoor bromeliads grow best with bright indirect light, warm temperatures, airflow, and moderate humidity. Their shallow root systems and unique central water cup make them very different from typical houseplants.
The Beauty and Diversity of Bromeliads
One reason bromeliads are so popular indoors is the huge variety of colors, textures, and growth forms available.
- Guzmania varieties are popular for their bright tropical flower bracts and tolerance for indoor humidity.
- Neoregelia bromeliads are grown mostly for their colorful foliage rather than flowers.
- Aechmea fasciata is known for its silver-striped leaves and long-lasting pink bloom spike.
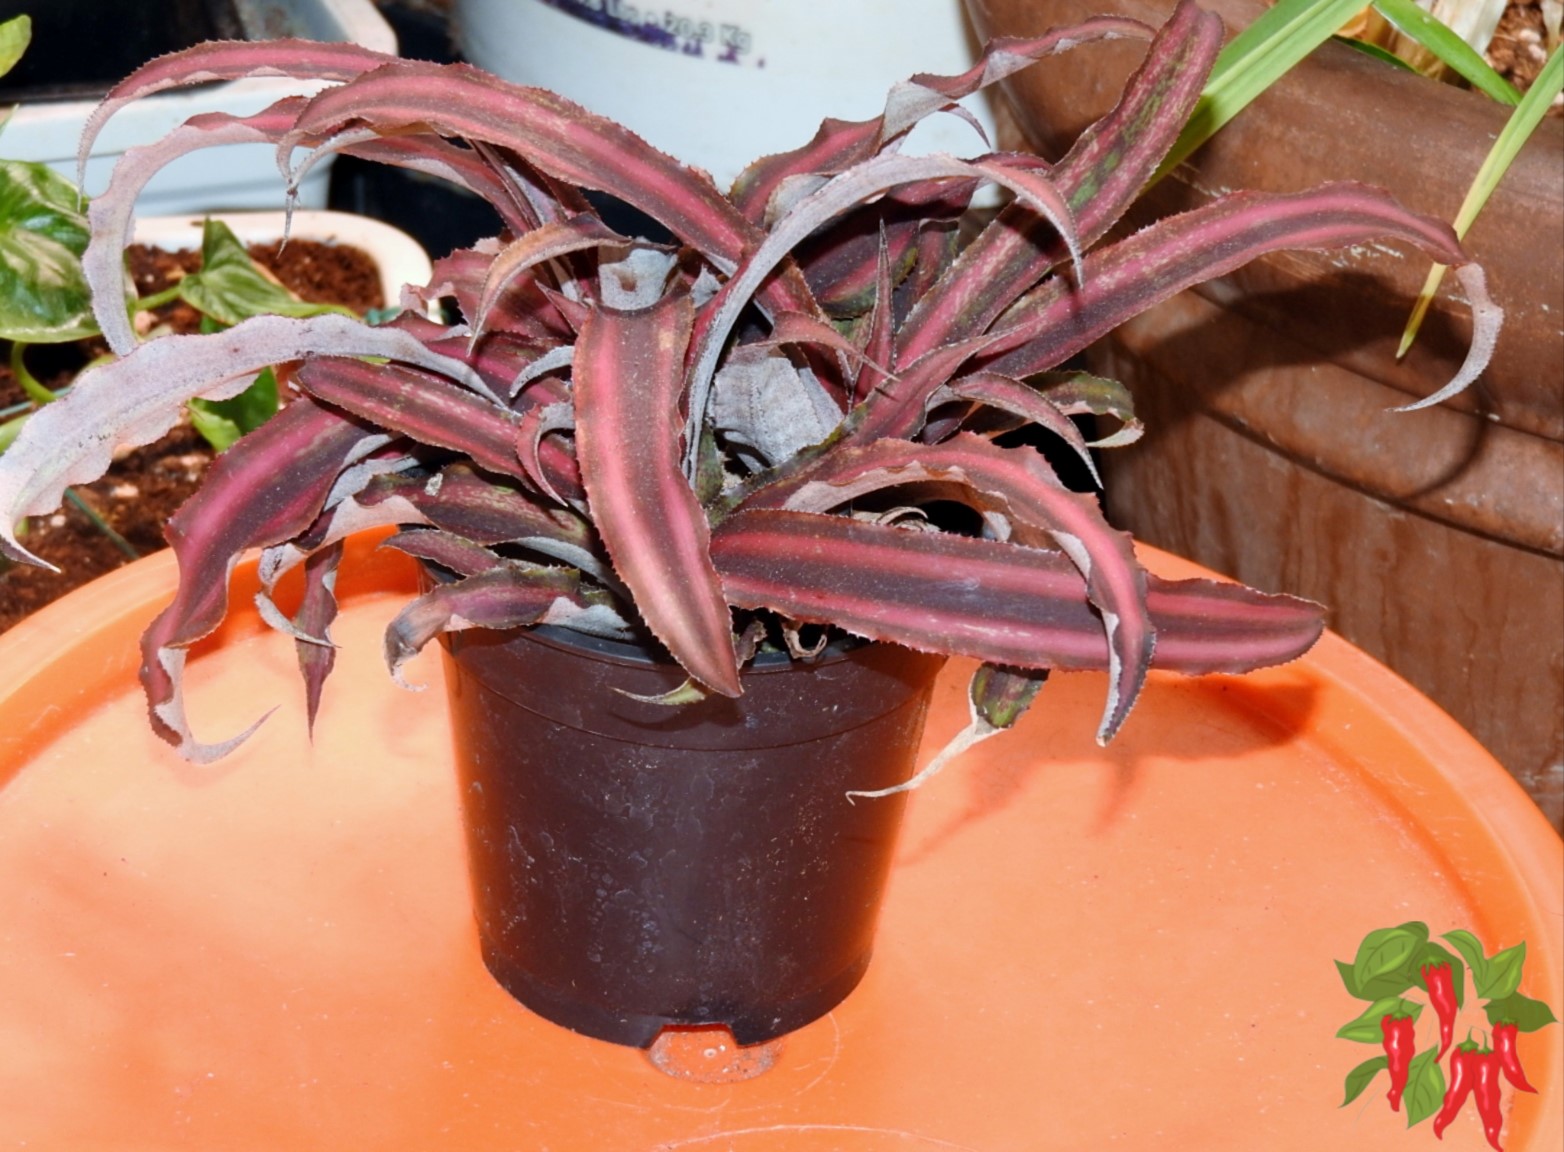
- Cryptanthus (Earth Stars) stay compact and work well in small indoor spaces or terrariums.
- Tillandsia (Air Plants) grow without soil and absorb moisture through their leaves.
Are Bromeliads Good Indoor Plants?
Yes. Bromeliads adapt very well to indoor growing conditions and are often easier to care for than many traditional houseplants.
Their compact root systems, colorful appearance, and relatively low watering needs make them ideal for apartments, offices, shelves, and small indoor growing spaces.
Most species also tolerate indoor humidity levels surprisingly well as long as airflow remains good and the potting mix drains quickly.
Bromeliad care indoors is easier than most people think once you understand how these plants grow.
With the right light, watering routine, and potting mix, bromeliads can thrive indoors and add a tropical look to any space.
Here’s how to grow and care for bromeliads indoors without overcomplicating things.
Popular Indoor Bromeliad Varieties:
- 🌟 Guzmani loves low light and thrives in humid rooms like bathrooms.
- 🎨 Neoregeli prized for its colorful foliage rather than flowers.
- 🌸 Aechmea fasciata is known for its striking pink bloom and silver-striped leaves.
- 🌿 Cryptanthus (Earth Stars): compact, ground-dwelling bromeliads with bold patterns.
- 💨 Tillandsia (Air Plants): Fascinating bromeliads that grow without soil and absorb water through their leaves.
🌬️ Air Plant Basics: Tillandsia, a genus within the bromeliad family, are true air plants! Instead of soil, they rely on tiny specialized cells called trichomes to absorb water and nutrients directly from the air. They love bright, indirect light and good airflow, and they look amazing mounted on driftwood or in hanging displays. 🌿✨

How to Grow Bromeliads
🌿 Growing bromeliads is a breeze once you get the hang of it! ✨
These adaptable plants are generally low-maintenance, making them a joy to care for. 🪴
To start, find the perfect spot for your bromeliad — one that provides bright, indirect light. ☀️
Next, ensure they have well-draining soil and a pot with drainage holes to prevent root rot. 💧
Remember, bromeliads prefer humidity, so misting or using a pebble tray can help maintain the right environment. 💦
With a little attention to their needs, you’ll see your bromeliads grow and thrive in no time! 🌱
Are Bromeliads Indoor Plants?
You bet! 🌟 Bromeliads make fantastic indoor plants due to their versatility and adaptability.
While they naturally grow in tropical environments, these beauties can easily acclimate to indoor conditions. 🌿
Their stunning appearance and ability to purify the air make them ideal additions to any home, office, or indoor space. 🏡
Just be sure to provide them with the right light, water, and humidity, and you’ll have a happy bromeliad on your hands. 🌸
Are Bromeliads Air Plants?
Some bromeliads are air plants, but not all bromeliads grow that way.
Air plants belong to the Tillandsia genus, which is part of the larger bromeliad family. Unlike traditional potted bromeliads, Tillandsias absorb moisture and nutrients mostly through their leaves instead of relying heavily on roots and soil.
That’s why many air plants can grow attached to wood, branches, shells, rocks, or decorative mounts without being planted in potting mix.
To learn more about the differences between bromeliads and air plants, visit our full guide on Are Bromeliads Air Plants?.
Planting Bromeliads Indoors

Planting bromeliads indoors is mostly about drainage, airflow, and keeping the base of the plant from sitting too wet.
Most bromeliads have small root systems, so they do not need a deep pot or heavy soil. A shallow container with drainage and a loose orchid-style mix usually works best.
How to Plant Bromeliads
- Choose a pot with drainage holes.
- Use a loose mix with bark, perlite, coco coir, or orchid mix.
- Set the bromeliad so the base sits slightly above the soil line.
- Firm the mix gently around the roots without burying the crown.
- Water lightly and place the plant in bright indirect light.
🌳 Mounting vs Pots: Which Is Best?
Many bromeliads can be grown in pots or mounted for a more natural look. 🪴🌿 Here’s a quick guide:
• Potted bromeliads are great for easy care. Just use a well-draining mix and water both the soil and central cup. 🪴
• Mounted bromeliads (on cork bark, wood, or other materials) mimic how many species grow in nature. 🌳 Mist them regularly, and ensure excellent airflow to prevent rot. 🌬️
Both methods work. Choose what suits your style and space! 🌟
Bromeliad Light Requirements Indoors
Bromeliads usually grow best in bright indirect light. An east-facing window, bright north-facing window, or filtered light near a south or west window can work well.
- Bright indirect light keeps foliage colorful.
- Harsh afternoon sun can scorch the leaves.
- Low light may cause dull color and slower growth.
- LED grow lights can help in darker rooms.
If your bromeliad starts looking stretched, dull, or weak, move it gradually into brighter indirect light.
Best Potting Soil for Bromeliads
Best Soil for Bromeliads
Bromeliads need a light, well-draining soil mix that allows for proper airflow. 🌱
A mix designed for orchids or bromeliads is ideal. You can also create your own blend using ingredients like bark, perlite, peat moss, and coconut coir. 🥥
Adding a bit of coarse sand can also improve drainage and mimic their natural growing conditions. 🏝️
The goal is to provide a mix that retains some moisture while allowing excess water to drain quickly. 💧
Watering Bromeliads Indoors
Most indoor bromeliads prefer light watering and fast drainage rather than constantly wet soil.
- 💧 Keep the central cup lightly filled with fresh water
- 🪴 Allow potting mix to dry slightly between waterings
- 🚫 Avoid soggy soil and standing water
- 🌬 Good airflow helps prevent rot
Flush the central cup occasionally with fresh water to prevent buildup and stagnation.
Best Fertilizer for Bromeliads
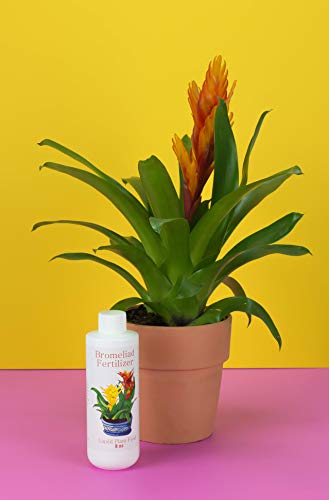
Bromeliads are not heavy feeders, so a light application of fertilizer is usually enough. 🌿
Use a balanced, water-soluble fertilizer diluted to half the recommended strength. 🌱
Apply the fertilizer to the soil or mist it onto the leaves every 4–6 weeks during the growing season. ☀️
Avoid over-fertilizing, as it can cause damage to your bromeliad’s delicate roots. 🚫
What are some Low Light Bromeliads?
There are several bromeliad varieties that can tolerate lower light conditions. Perfect for spots where sunlight is limited. 🌑
While they may not grow as quickly or display as vibrant colors as they would in brighter light, these low-light bromeliads can still make fantastic indoor plants: 🌿
 Bromeliad Neoregelia Zotica 4-6″ Tall – 3ct – Tropical Plant – Live Arrival Guaranteed
- 🔥 Neoregelia ‘Fireball’: A small, colorful bromeliad with deep red leaves. In lower light, leaves may appear greener.
- 🎨 Vriesea splendens (Flaming Sword): Famous for its bold, striped leaves and bright red flower spike. Adapts well to lower light.
- 🌸 Guzmania lingulat A popular indoor bromeliad with glossy green leaves and a long-lasting colorful flower bract. Tolerates low light but blooms best with moderate light.
- 🌷 Aechmea ‘Del Mar’: Features green foliage and a striking pink flower spike. Can adapt to various light levels, including low light.
- 💧 Billbergia nutans: An epiphytic bromeliad that handles lower light levels well. Known for its graceful, arching foliage and delicate, dangling flowers.
🌟 Tip: While these bromeliads can adapt to lower light, providing bright, indirect light when possible will help maintain more vibrant colors and encourage blooming. If your bromeliad looks dull or stretched, consider moving it to a brighter spot! 🌞
🌡️ Temperature & Humidity Tips
Bromeliads thrive in warm, humid environments. Aim to keep your space between 60°F and 80°F (15°C to 27°C) for optimal growth. 🌞 Cooler nighttime temps after blooming can help extend flower life. ❄️
🌬️ Airflow matters! Good circulation helps prevent fungal problems. Place your bromeliads where air can move gently around them. Using a fan or opening a window works wonders.
💦 To boost humidity, especially in dry homes, use a pebble tray or mist your plant regularly. Bathrooms and kitchens often make great homes for these tropical beauties! 🚿
🍎 Boost Bloom Tip: Want to encourage your bromeliad to bloom? Place a ripe apple near the plant and loosely cover both with a clear plastic bag for about a week. The apple releases ethylene gas, which can help trigger flowering. Just be patient. It’s a fun little trick that works wonders! ✨
Growing Bromeliads in Pots

Most bromeliads grow very well in containers as long as the potting mix drains quickly and airflow remains good.
Choosing the right container, potting mix, and drainage setup can make a huge difference in preventing root rot and keeping bromeliads healthy indoors.
For a full guide on pot selection, mounted bromeliads, drainage, airflow, and container growing setups, visit our guide on Growing Bromeliads in Pots.
Propagating and Transplanting Bromeliads
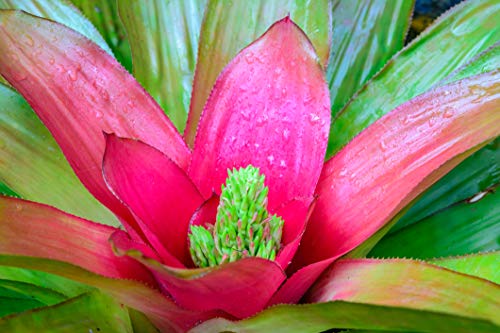
In this section, we’ll walk you through the process of turning one bromeliad into many, covering the ins and outs of propagation through pups and diving into the best methods for transplanting your new plant babies. 🌱
Bromeliad Lifecycle and Pups
Most bromeliads flower once before producing offsets called pups.
After blooming, the parent plant slowly declines while new pups continue growing from the base.
These pups can eventually be separated and grown into mature bromeliad plants of their own.
Here’s what to expect as your bromeliad grows: 🌱
- 🌿 Year 1: Healthy foliage growth
- 🌸 Year 2–3: Bloom cycle once in a lifetime! After blooming, the mother plant will gradually decline. 🌈
- 🌱 Pup Production: Mother plant produces offsets (pups) before fading.
- 🪴 Propagation: Separate pups when they reach 1/3 the size of the parent and start the cycle again!
How to Propagate Bromeliads
Pups and Offsets
Propagating bromeliads using pups, or offsets, is the easiest and most common method.
As the mother plant matures, it produces baby plants around its base. 👶🌱
Once the pups reach about one-third the size of the mother plant or have several roots, they’re ready to be removed. ✂️
Gently separate the pup from the mother plant using a clean, sharp knife or by gently twisting and pulling. 🌿
Plant the pup in a well-draining potting mix, and care for it as you would a mature bromeliad. 🌸
Seed Propagation
Seed propagation is less common and can be more challenging, but it’s still possible! 🌱
To start, collect seeds from a mature bromeliad after it has flowered. 🌸 Spread the seeds on a well-draining potting mix and lightly mist them with water. 💧
Cover the container with plastic wrap to maintain humidity and place it in a warm, bright location with indirect light. ☀️
Keep the seeds moist but not soggy. Germination may take several weeks, and the seedlings will grow slowly. 🌿 Once they’re large enough to handle, transplant them into individual pots. 🪴
How to Transplant Bromeliads
Transplanting Bromeliads
When transplanting a bromeliad, choose a pot that’s slightly larger than its root system, ensuring it has drainage holes. 🪴
Prepare a well-draining potting mix, such as a combination of coco coir, perlite, and bark. 🥥🌿
Gently remove the bromeliad from its current pot, loosening the soil around the roots. ✋
Place the plant in the new pot and fill it with potting mix, making sure the base of the plant is slightly above the soil line. 🌱
When and How to Separate Pups
Separate pups from the mother plant when they’re about one-third the size of the parent or have developed several roots. 🌿
Using a clean, sharp knife or by gently twisting and pulling, detach the pup from the mother plant, taking care not to damage the pup’s roots. ✂️
Plant the pup in a well-draining potting mix and care for it as you would a mature bromeliad. 🌸
Do You Need to Repot Bromeliads And If So, How Often?
Bromeliads typically don’t require frequent repotting, as they have shallow root systems and can happily grow in the same pot for several years. 🪴
However, if you notice the potting mix has broken down, the plant is root-bound, or the pot is too small for the growing bromeliad, it’s time to repot. 🌿
Generally, repotting every 2-4 years is sufficient for most bromeliads. ⏳
When repotting, choose a slightly larger pot and fresh, well-draining potting mix to give your bromeliad the best environment to continue thriving. ✨
🌱 And remember, after blooming, your bromeliad will produce pups that you can propagate to keep the life cycle going! 🌿✨
Bromeliad Care and Maintenance

Here we dive into the essentials of bromeliad care and maintenance! 🌿
These colorful, captivating plants may look exotic and high-maintenance, but with a little know-how, they’re actually quite easy to care for. ✨
In this section, we’ll discuss everything from watering and fertilizing to managing pests and ensuring your bromeliads are safe for pets. 🪴
So, let’s dive in and learn the tips and tricks that will keep your bromeliad collection looking lush, vibrant, and thriving all year round! 🌸
Pruning and Grooming
Keeping your bromeliads well-groomed helps maintain their stunning appearance and overall health. ✂️ Here are a few simple steps to follow:
• Remove Dead Leaves: As your bromeliad matures, some of its lower leaves may turn brown or yellow. 🍂
Gently remove these leaves by pulling them away from the base or using clean, sharp pruning shears. ✂️
This will encourage new growth and keep your plant looking tidy. 🌱
• Trim Flower Spikes: After a bromeliad has finished blooming, the flower spike will eventually wither and die. 🌼
Use clean, sharp pruning shears to trim the dead flower spike close to the base of the plant. ✂️
This helps direct energy back into the plant, promoting new growth and the formation of pups. 🌿
• Maintain the Water Reservoir: Many bromeliads have a central cup, or tank, that collects water. 💧
Periodically flush the cup with clean water to prevent the buildup of debris and bacteria. 🚿
⚠️ Important: Always allow the cup to drain and avoid stagnant water. This helps prevent crown rot and keeps your plant healthy. 💦
You can use a small watering can or a gentle stream of water from the faucet. 🚰
What is a central tank?
A central tank, also known as a water reservoir or cup, is a unique feature of many bromeliads — especially those belonging to the genera Guzmania, Vriesea, and Neoregelia. 💧
This tank is formed by the overlapping arrangement of the plant’s leaves at the base, creating a natural water-holding structure. 🌿
In their native habitats, bromeliads with central tanks collect rainwater, organic debris, and even small insects in these reservoirs. 🪲🌧️
The tank provides a constant source of water and nutrients for the plant, which it absorbs through specialized cells called trichomes on the leaf surfaces. 🌱
In addition, the water-filled central tank creates a microhabitat for various organisms, such as insects, frogs, and other small creatures, which contribute to the bromeliad’s nutrient intake as they decompose. 🐸🦟
When caring for bromeliads with central tanks, it is essential to keep the tank filled with water, as it is a crucial aspect of the plant’s hydration and nutrition. 💦
However, it’s also important to periodically flush the tank with clean water to prevent the buildup of debris and bacteria that could harm the plant. 🚿⚠️
Detecting and Addressing Common Pests and Diseases
Bromeliads may occasionally be affected by pests or diseases. 🐛 Here’s how to detect and address common issues:
• Scale Insects: Scale insects are small, round pests that suck sap from the plant, causing yellowing leaves and stunted growth. 🐞
If you notice scale insects, gently scrape them off with a soft brush or your fingernail. You can also treat the affected area with insecticidal soap or neem oil. 🧴
• Mealybugs: Mealybugs are small, white, cottony insects that can cause leaf distortion and yellowing. 🐛
To remove mealybugs, use a cotton swab dipped in rubbing alcohol to gently wipe them away. 🧽 For more severe infestations, apply insecticidal soap or neem oil. 🌿
• Fungal Diseases: Overwatering and poor air circulation can lead to fungal diseases in bromeliads. 🍄
To prevent fungal issues, ensure your potting mix is well-draining, avoid overwatering, and maintain proper air circulation around your plants. 🌬️
If you spot any signs of fungal disease, such as black or brown spots on leaves, remove the affected parts and consider applying a fungicide specifically labeled for bromeliads. 🧴
✨ Bonus Tip: Regularly inspect your bromeliads, especially during seasonal transitions (spring and fall). This is when pests are most active! 🐜
🦗 Natural Helpers: Beneficial insects like ladybugs can also help keep pests in check. Consider introducing them to your indoor garden for an eco-friendly solution! 🐞
By regularly grooming and monitoring your bromeliads for pests and diseases, you’ll keep them looking healthy and vibrant. 🌸
Are Bromeliads Safe for Pets?

Most bromeliads are generally considered non-toxic to cats and dogs, but it is still best to keep pets from chewing the leaves.
Chewing any houseplant can still cause mild stomach upset, and sharp leaf edges may irritate a curious pet’s mouth.
If you have pets that nibble plants, place bromeliads on shelves, plant stands, or in hanging displays where they are harder to reach.
Are Bromeliads Safe for Cats?
The good news for cat owners is that bromeliads are generally considered non-toxic to cats. 🐱🌿
The American Society for the Prevention of Cruelty to Animals (ASPCA) lists most bromeliad species as safe for our feline friends. ✅
While ingesting parts of a bromeliad might cause mild gastrointestinal upset in your cat, it’s not likely to result in severe poisoning or long-term health issues. 🩺
Tips for Keeping Pets and Bromeliads Safe
Provide a Dedicated Space for Your Plants: 🌿 To minimize any potential issues between pets and bromeliads, create a dedicated plant space where your pets can’t access the plants.
This could be a separate room, a high shelf, or a hanging planter that’s out of reach of curious paws. 🐾
Train Your Pets: 🐕🐈 Teach your pets, especially cats and dogs, to avoid nibbling on plants.
Training them with verbal commands or using deterrents like citrus or bitter sprays on the plants can help keep both your pets and bromeliads safe. 🍋🚫
Monitor Your Pets: 👀 Keep an eye on your pets when they’re around your bromeliads, and watch for any signs of them chewing on or ingesting parts of the plant.
If you notice any unusual behavior or symptoms, consult your veterinarian immediately. 🩺
Choose Pet-Friendly Bromeliads: 🪴 While most bromeliads are considered safe for pets, it’s always a good idea to double-check before adding a new plant to your collection.
Research the specific bromeliad species you’re interested in and ensure it’s non-toxic to your pets. 📚
By following these tips, you can create a safe and harmonious environment for both your bromeliads and pets, ensuring they coexist happily in your home. 🌿🐾🏠
Bromeliad Care FAQs
How do you take care of a potted bromeliad?
A potted bromeliad needs bright, indirect sunlight and prefers a well-draining potting mix. 🪴
Keep the central cup filled with distilled water and water the soil sparingly. Good airflow is also beneficial for the plant.
How often do you water bromeliads?
The frequency of watering will depend on the humidity and temperature of your home.
Generally, you should aim to keep the central cup filled with water.
As for the soil, water it when it feels dry to the touch, but avoid waterlogging.
What do you do with a bromeliad flower after it dies?
Once the flower has died, you can cut it off to improve the plant’s appearance.
This will also encourage the plant to focus its energy on producing pups, or baby bromeliads, at its base.
How long do potted bromeliads last?
The lifespan of a potted bromeliad can vary, but generally, the mother plant will die after flowering.
However, it will usually produce pups before it dies, which can be separated and repotted to continue the lifecycle. With proper care, each generation can last for several years.
How To Care For Bromeliads: Conclusion

Bromeliad care indoors is much easier once you understand their light, watering, and airflow needs.
With bright indirect light, a fast-draining potting mix, and careful watering, bromeliads can thrive indoors for years while adding bold tropical color to your space.
Whether you grow traditional bromeliads or air plants like Tillandsia, these low-maintenance tropical plants make excellent indoor houseplants for beginners and collectors alike.
📚 Bromeliad Resources
- Bromeliad Society International – Bromeliad species information, growing resources, and society chapters
- Florida Council of Bromeliad Societies – Bromeliad photo index and cultivation information
- University of Florida IFAS – Bromeliads – University growing information and indoor care basics
- UF Extension Bromeliad Growing Guide – Detailed bromeliad culture and care information
Books and Websites on Bromeliad Care
Must-Read Books: 📖 Check out books like “Bromeliads for Home, Garden and Greenhouse” by David H. Benzing to expand your bromeliad knowledge.
Ready to Keep Learning? 🌿
If you loved diving into bromeliad care, here are a few more helpful guides to grow your indoor gardening skills:
- 🪴 Complete Houseplant Care Guide
- 🌿 Best Low Light Indoor Plants
- 🌸 Beautiful Flowering Houseplants to Brighten Your Home
- 🐾 Pet-Safe Indoor Plants
- 🌴 Indoor Palm Trees: Best Varieties & Easy Care Tips
🌟 Happy planting and may your bromeliads thrive!