
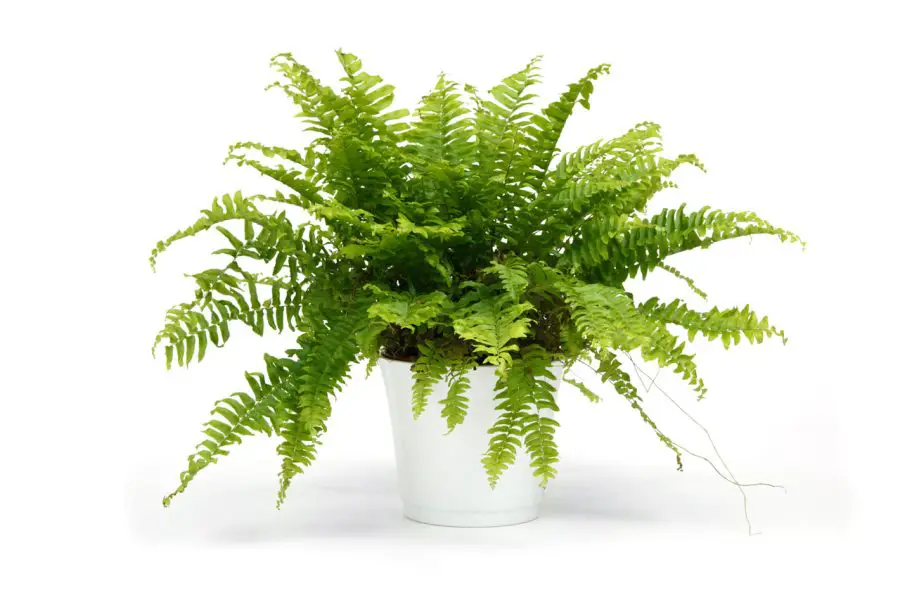
Boston Fern care indoors is all about moisture, humidity, and soft filtered light. These classic ferns are loved for their long arching fronds and full, cascading shape, making them one of the most popular ferns for hanging baskets and plant stands.
Known botanically as Nephrolepis exaltata, Boston Ferns naturally grow in warm, humid tropical environments where moisture stays consistent and sunlight is filtered through tree canopies. Recreating those conditions indoors is the key to success.
While Boston Ferns can be a little more demanding than tougher houseplants, they reward you with lush green growth when given the right balance of water, humidity, and light. In this guide, you’ll learn how to care for Boston Ferns indoors, fix common problems, and keep them thriving year-round.
What You’ll Learn 🌿
- ☀️ How much light Boston Ferns need indoors
- 💧 How to water without drying out or overwatering
- 🌫️ The humidity levels Boston Ferns need to stay lush
- 🪴 The best soil mix and repotting schedule
- ✂️ Easy propagation methods for new plants
- ⚠️ Common problems and how to fix them fast
Quick Answer 🌿
Boston Fern grows best indoors in bright indirect light, consistently moist soil, and high humidity. Keep it away from direct sun, never let it fully dry out, and use a loose soil mix with good drainage for healthy green fronds.
You can buy your Boston Fern here on Amazon
Introducing Boston Fern Care Indoors

Boston Fern care indoors starts with understanding what this classic fern needs to stay full, green, and healthy. Known for its soft arching fronds and lush appearance, Boston Fern is one of the most popular indoor ferns for hanging baskets, plant stands, and bright bathrooms.
Its scientific name is Nephrolepis exaltata, and it has been a favorite houseplant for generations because of its full tropical look and ability to thrive indoors with the right care. Unlike tougher houseplants, Boston Fern depends on steady moisture and higher humidity to look its best.
When given bright indirect light, regular watering, and good humidity, Boston Fern can become a thick, cascading centerpiece that adds natural texture and color to your home.
In this guide, you’ll learn everything you need to know about Boston Fern care indoors, including watering, light, humidity, soil, and how to fix common problems before they damage the plant.
Boston Ferns: A Quick Overview
Boston Ferns are known for their lush, green foliage and elegant appearance.
They are native to tropical regions and thrive in warm, humid conditions.
These ferns can grow up to 2-3 feet tall and wide, making them a great statement plant.
Boston Ferns are also non-toxic, which makes them safe new plants to keep around pets and children.
According to Wikipedia: Nephrolepis is a genus of about 30 species of ferns. It is the only genus in the family Nephrolepidaceae, placed in the suborder Aspleniineae. The genus is commonly referred to as macho ferns or Boston Ferns. The fronds are long and narrow, and once-pinnate, in the case of one Bornean species reaching thirty feet (nine meters) in length.
Boston Fern Light Requirements Indoors
Light is a crucial element in plant care, and it’s essential to know what kind of light your plant needs to thrive.
Boston Ferns, in particular, require a specific amount and type of light to grow healthy and strong.
In this section, we’ll cover everything you need to know about Boston fern light requirements indoors, from ideal light conditions to signs of too much or too little light.
The Ideal Light Conditions for Your Boston Fern
Boston Ferns thrive in bright, indirect light. Direct sunlight can scorch the leaves, and too little light can cause the leaves to yellow and wilt.
Place your fern near a north-facing window or a few feet away from a sunny window with a sheer curtain to filter the light.
Artificial light sources such as grow lights can also provide adequate light for your fern.
Signs of Too Much or Too Little Light
If your Boston fern is getting too much light, the leaves will turn yellow or brown and start to dry out.
Conversely, if your fern isn’t getting enough light, the leaves will turn yellow and may start to wilt or fall off.
Keep an eye out for these signs and adjust the light conditions accordingly.
Tips for Adjusting Light Conditions
If you notice that your Boston fern isn’t getting enough light, move it to a brighter location.
On the other hand, if you notice signs of too much light, move the plant further away from the window or filter the light with a sheer curtain.
You can also rotate your fern regularly to ensure that all sides get an equal amount of light.
Remember to monitor your plant and adjust the light conditions as needed.
Artificial light can be used to supplement natural light
While natural light is ideal for Boston Ferns, it’s not always possible to provide enough of it indoors, especially in areas with limited access to indirect sunlight.
In such cases, artificial light can be used to supplement natural light and provide adequate growing conditions for the ferns.
There are several types of artificial light that can be used for indoor plants, including fluorescent and LED grow lights.
Fluorescent lights are a popular choice for their affordability and availability in most hardware stores.
They are also fairly energy-efficient and emit a broad spectrum of light that is suitable for most plants, including Boston Ferns.
LED lights, on the other hand, are a bit more expensive but last longer and are also much more energy-efficient.
They also emit less heat and many can be adjusted to provide the specific level of light that is most beneficial to the plants.
Grow lights are specialized lights that are specifically designed for plant growth and are available in a full spectrum to promote specific stages of growth.
It’s important to note that while artificial light can be a useful supplement to natural light, it’s still important to provide some exposure to natural light whenever possible.
A combination of natural and artificial light can provide the best results and growing conditions for Boston Ferns indoors.
Best Indoor Locations For Boston Fern
Boston Fern placement can make a huge difference because this plant depends on both humidity and gentle light.
Bathrooms With Windows
One of the best spots because natural humidity helps prevent crispy fronds.
North-Facing Windows
Provides soft indirect light without the risk of leaf scorch.
Bright Kitchens
Kitchens often stay slightly more humid and work well if light is filtered.
Plant Stands Near East-Facing Windows
Morning light is usually gentle enough while still providing strong growth.
Boston Fern Water Requirements

Watering your plants is a crucial aspect of plant care, and it’s important to know how much and how often to water them.
Boston Ferns, in particular, have specific water requirements that can vary depending on the environment they’re in.
In this section, we’ll cover everything you need to know about Boston fern water requirements, from how often to water to signs of overwatering or underwatering.
How Often to Water Your Boston Fern
Boston Ferns require consistently moist soil, but not overly saturated.
It’s essential to water them regularly, especially during the hot summer months, to keep the soil moist.
Generally, watering once or twice a week should be sufficient, but you can adjust this based on the humidity levels in your home.
Signs of Overwatering or Underwatering
Overwatering can lead to root rot, which is characterized by yellow or brown leaves and a foul smell.
On the other hand, underwatering can cause the leaves to turn brown, crispy, and brittle.
Keep an eye out for these signs and adjust your watering routine accordingly.
Tips for Proper Watering Techniques
When watering your Boston fern, make sure to water the soil directly rather than the leaves.
Water until the soil is moist but not waterlogged, and allow any excess water to drain out of the pot.
Avoid letting the soil dry out completely between watering, as this can lead to stress on the plant.
You can also use a humidifier or a pebble tray to increase the humidity around your fern and keep the soil moist.
Boston Ferns prefer to be kept consistently moist but not waterlogged, and they may benefit from occasional misting to increase humidity.
Misting can help prevent the fronds from drying out and becoming crispy, especially in dry indoor environments.
In the section on water requirements, it’s important to note that Boston Ferns prefer to be kept consistently moist but not waterlogged.
Overwatering can lead to root rot and other problems, so it’s important to allow the soil to dry slightly between waterings.
On the other hand, underwatering can cause the fronds to turn yellow and drop prematurely.
Water requirements for Boston Ferns
As mentioned, Boston Ferns prefer to be consistently moist, but not waterlogged.
This means that they should not be allowed to completely dry out between waterings, but also should not sit in water that is not able to drain away.
You can stick your finger an inch or two into the soil surface and if it feels dry then it’s time to water again.
Avoid Using Tap Water
However, it’s important to note that tap water may not be the best choice for misting a Boston fern.
Tap water can contain minerals and chemicals that can build up in the soil and on the fronds over time and may ultimately harm the plant.
Instead, it’s recommended to use distilled water, RO water or rainwater.
Letting water stand overnight no longer works because chloramines don’t evaporate as chlorine did.
Boston Fern Humidity

These tropical plants thrive in high-humidity environments, making them an excellent addition to your bathroom or kitchen.
In this section, we’ll cover the importance of humidity for Boston Ferns, ways to increase humidity indoors, and tips for maintaining ideal humidity levels.
The Importance of Humidity for Boston Ferns
Boston Ferns are native to tropical regions, where they thrive in humid environments.
Without proper humidity levels, your fern can quickly become dehydrated and start to dry out.
Keeping the air around your Boston fern moist can help maintain its overall health and prevent brown, crispy leaves.
Ways to Increase Humidity Indoors
One way to increase humidity around your Boston fern is by using a humidifier.
You can also place a tray of water near your plant, or use a pebble tray.
Simply fill a tray with small pebbles and water, then place your fern on top of the pebbles.
As the water evaporates, it will create a humid microclimate around your fern.
Tips for Maintaining Ideal Humidity Levels
To maintain ideal humidity levels, it’s essential to keep a close eye on the moisture level of the soil.
You can also mist your fern regularly to increase humidity levels, but be sure not to overdo it, as too much misting can lead to fungal diseases.
Keep your fern away from air conditioning vents or heating units that can dry out the air.
Consider grouping your plants together to create a more humid environment. With these tips, your Boston fern will be thriving in no time!
Soil for Boston Ferns

These plants require a well-draining, nutrient-rich soil that retains moisture but doesn’t become waterlogged.
One popular soil amendment used for Boston Ferns is peat moss. Peat moss is a partially decomposed organic material that is harvested from bogs.
It is an excellent soil conditioner that improves soil structure and water retention while also providing some nutrients to the plant.
Coco Coir Vs Peat Moss
However, the use of peat moss has come under scrutiny due to environmental concerns.
Peat bogs are important ecosystems that provide a habitat for a variety of plants and animals, and the harvesting of peat moss can disrupt these ecosystems.
Additionally, the decomposition of peat moss releases large amounts of carbon dioxide into the atmosphere, contributing to climate change.
As an alternative to peat moss, many gardeners are turning to coco coir.
Coco coir is a byproduct of the coconut industry and is made from the fibrous husks of coconut shells.
It is an excellent soil amendment that improves soil structure and water retention, similar to peat moss.
Additionally, it is a sustainable alternative that does not contribute to the destruction of peat bogs.
Coco coir is relatively low in nutrients, so it may be necessary to supplement the soil with additional fertilizers.
While peat moss has long been a popular soil amendment for Boston Ferns, the use of coco coir as an alternative is a sustainable option that can provide better benefits to the plant without contributing to environmental destruction.
Repotting Boston Ferns

Repotting is an important aspect of caring for Boston Ferns. Over time, the plant may outgrow its container or the soil may become depleted of nutrients.
Repotting provides the plant with fresh soil and more room to grow, which can help improve its overall health and appearance.
How often to repot Boston Ferns:
Boston Ferns generally need to be repotted every 1-2 years, depending on their size and growth rate.
Signs that your Boston fern needs to be repotted include roots that have filled the container, soil that dries out quickly after watering, and leaves that are yellowing or wilting.
How to repot Boston Ferns:
Choose the right pot: Select a pot that is slightly larger than the current one and has drainage holes at the bottom.
It’s important to choose a pot with good drainage to prevent waterlogging and root rot.
Prepare the potting mix: Use a well-draining soil mix that is rich in organic matter.
You can use a mixture of peat moss, perlite, and vermiculite. Alternatively, you can use a commercial potting mix designed specifically for ferns. I recommend a 70/30 mix of coco coir and perlite.
Remove the plant from its current pot: Gently loosen the soil around the root ball with your fingers or a small tool.
Carefully lift the plant out of the pot, being careful not to damage the root ball.
Inspect the roots: Check the roots for any signs of damage or disease.
Trim off any dead or damaged roots with a sharp, clean pair of scissors or pruning shears.
Add soil to the new pot: Add a layer of fresh potting mix to the bottom of the new pot. Place the plant in the center of the pot, making sure the roots are spread out evenly.
Add soil to fill the pot: Fill the pot with soil, making sure to firm it down gently around the roots.
Leave about 1 inch of space at the top of the pot to allow for watering.
Water the plant: Water the plant thoroughly, making sure the soil is evenly moist. Allow the excess water to drain out of the bottom of the pot.
Place the plant in a suitable location: Boston Ferns prefer bright, indirect light and high humidity.
Place the plant in a location that receives bright, filtered light and is away from direct sunlight.
You can also place a tray of water near the plant to increase humidity.
Boston Fern Fertilizer

If you want your Boston fern to reach its full potential, you’ll need to feed it with the right nutrients.
That’s where fertilizers come in. Fertilizers are essential for promoting growth, keeping leaves lush and green, and helping your fern stay healthy.
But it’s important to not use too much fertilizer.
Importance of fertilizing Boston Ferns
Fertilizing your Boston fern is crucial to its growth and overall health.
As a plant that’s often kept indoors, it doesn’t get the same access to nutrients as those grown outdoors in soil.
Balanced fertilizers provide essential nutrients like nitrogen, phosphorus, and potassium and trace elements that your fern needs to thrive.
Recommended fertilizer types and frequency
When it comes to fertilizing your Boston fern, you’ll want to use a balanced fertilizer that contains equal amounts of nitrogen, phosphorus, and potassium that includes trace minerals.
You can choose from liquid, granular, or slow-release fertilizers. It’s recommended to fertilize your fern every 2-3 months and the best time is during the growing season, which is usually from late spring to early fall.
Tips for proper fertilization techniques
To ensure proper fertilization, it’s a good idea to dilute the fertilizer to half the recommended strength and apply it evenly to the soil.
Apply fertilizer to the base of the plant. Make sure not to get any fertilizer on the leaves, as this can burn them.
Additionally, always water your fern thoroughly after fertilizing to prevent any buildup of fertilizer salts.
With proper fertilization techniques, your Boston fern will continue to thrive and flourish.
Using a complete balanced, water-soluble fertilizer is recommended, and it’s important to avoid overfertilizing, which can lead to burnt or yellowed fronds.
Fertilizing Boston Ferns is an important part of their care routine, as it can provide essential nutrients that the plant may not be able to obtain from the soil alone.
However, it’s important to use the right type of fertilizer and avoid overfertilizing, which can cause more harm than good.
A balanced, water-soluble fertilizer is recommended for Boston Ferns.
This means that the fertilizer should contain roughly equal amounts of nitrogen, phosphorus, and potassium, as well as other trace minerals that are important for plant growth.
These fertilizers are typically labeled with numbers that indicate the ratio of these nutrients, such as 10-10-10 or 20-20-20.
When fertilizing Boston Ferns, it’s important to follow the manufacturer’s instructions carefully.
Overfertilizing can cause the fronds to become burnt or yellowed, and may ultimately harm the plant.
In general, it’s better to err on the side of caution and to fertilize less often than to risk overfertilization.
A general guideline is to fertilize every 2-3 months during the growing season, which typically runs from spring through fall.
It’s also important to avoid fertilizing Boston Ferns during the winter months, as the plant is typically in a dormant state during this time and doesn’t require as many nutrients.
Additionally, it’s important to water the plant thoroughly before and after fertilizing, as this can help prevent fertilizer burn and ensure that the nutrients are distributed evenly throughout the soil.
Boston Fern Propagation

Boston Ferns are easy to propagate, and there are several methods you can use to create new plants. Here are three of the most common methods:
Division:
Division is the easiest method of propagating Boston Ferns. This method involves separating the plant into smaller sections, each with its own root system.
Here’s how to do it:
Remove the plant from its pot and gently shake off any loose soil.
Carefully separate the plant into smaller sections, making sure each section has its own root system.
Repot each section into a separate pot filled with fresh potting mix.
Water the new plants thoroughly and place them in a bright, indirect light.
Spores:
Boston Ferns also reproduce via spores, which are small, powdery structures found on the undersides of the leaves.
Here’s how to propagate Boston Ferns via spores:
Wait until the spores are brown and fully mature. They will look like small brown spots on the underside of the leaves.
Cut off a leaf that has mature spores and place it into a paper bag. Allow the spores to fall off into the bag.
Fill a small pot with a mixture of peat moss and perlite, and moisten the soil with water.
Sprinkle the spores onto the surface of the soil and cover the pot with a plastic bag to create a mini greenhouse.
Place the pot in a bright, indirect light and keep the soil moist. The spores should germinate within a few weeks.
Rhizome cuttings:
Another method of propagating Boston Ferns is by taking rhizome cuttings. Rhizomes are horizontal stems that grow underground and produce roots and new shoots.
Here’s how to do it:
Remove the plant from its pot and carefully separate the rhizomes from the root ball.
Cut the rhizomes into sections, making sure each section has at least one healthy shoot and some roots.
Plant each section into a separate pot filled with fresh potting mix.
Water the new plants thoroughly and place them in a bright, indirect light.
In conclusion, propagating Boston Ferns is a fun and easy way to create new plants.
Division, spores, and rhizome cuttings are three common methods that you can use to propagate Boston Ferns.
Experiment with each method to find the one that works best for you.
With a little patience and care, you can easily propagate Boston Ferns and add more green to your indoor space.
Boston Fern Insect Pests Control
 Boston Ferns can be prone to a few insect pests that can damage the plant and impact its growth.
Here are some common insect pests that can affect Boston Ferns and how to control them:
Scale insects:
Scale insects are small, round, and flat insects that attach themselves to the leaves of Boston Ferns.
They can cause yellowing, wilting, and stunted growth of the plant.
Here’s how to control them:
Use a soft-bristled brush to remove the scales from the leaves of the plant.
Wipe the leaves with a cotton swab dipped in alcohol to kill any remaining insects.
Repeat the process every week until the scales are completely removed.
Alternately you can use a spray of insecticidal soap or neem oil to kill them.
Spider mites:
Spider mites are tiny, spider-like insects that feed on the underside of leaves, causing yellowing and mottled leaves.
Here’s how to control them:
Spray the plant with a fine mist of water to dislodge the spider mites.
Apply a solution of neem oil or insecticidal soap to the plant, following the manufacturer’s instructions.
Repeat the process every week until the spider mites are eliminated.
Mealybugs:
Mealybugs are small, white, cottony insects that suck the sap from the plant, causing yellowing, stunted growth, and wilting.
Here’s how to control them:
Use a soft-bristled brush to remove the mealybugs from the leaves of the plant.
Wipe the leaves with a cotton swab dipped in alcohol to kill any remaining insects.
Apply a solution of neem oil or insecticidal soap to the plant, following the manufacturer’s instructions.
Repeat the process every week until the mealybugs are eliminated.
Thrips:
Thrips are tiny, slender insects that feed on the leaves of the plant, causing silvering, scarring, and distorted growth.
Here’s how to control them:
Apply a solution of insecticidal soap or neem oil to the plant, following the manufacturer’s instructions.
Repeat the process every week until the thrips are eliminated.
In conclusion, Boston Ferns can be affected by several insect pests that can damage the plant’s growth and appearance.
The key to controlling these pests is to identify them early and take prompt action to eliminate them.
Regular inspection and proper care can help keep your Boston Ferns healthy and free from insect pests.
Boston Fern Indoor Winter Care Tips

Boston Ferns are native to tropical regions and are accustomed to warm, humid environments.
As a result, they may require extra care to survive during the colder winter months.
Boston Ferns prefer temperatures between 60-75°F (15-24°C), and may suffer if temperatures drop too low.
If your home or indoor growing space tends to get chilly during the winter, you may need to move your Boston fern to a warmer location, such as a room with more sunlight or a space heater to maintain a consistent temperature.
Boston Ferns typically require less water and nutrients during the winter, as they may be in a dormant state.
However, it’s still important to monitor the soil moisture levels and ensure that the plant is not drying out completely.
Boston Fern Bathroom Care

If you’re looking to add some greenery to your bathroom, a Boston fern might be a perfect choice.
Not only do they look great, but they also thrive in the humid environment of a bathroom.
In this section, we’ll cover everything you need to know about caring for a Boston fern in your bathroom.
Benefits of Placing a Boston Fern in a Bathroom:
Adding greenery to your bathroom can improve air quality, reduce stress, and add a spa-like ambiance.
Boston Ferns are especially suited for bathrooms because they thrive in humid environments.
Tips for Caring for a Boston Fern in a Bathroom:
To care for your Boston fern in the bathroom, keep the soil moist but not waterlogged, ensure that there is enough light, and maintain a consistent temperature.
You can also mist the plant occasionally to maintain humidity levels.
Boston Fern Problems

Even with good care, Boston Ferns can run into problems from time to time. Because they rely heavily on steady moisture and humidity, they often show stress quickly when something is off.
The most common issues include yellowing leaves, brown crispy fronds, wilting, and leaf drop. These problems are usually tied to watering mistakes, low humidity, poor light, or sudden temperature changes.
The good news is that most Boston Fern problems can be fixed if caught early. Regularly checking your plant for changes in color, texture, or pests can help you correct issues before they become serious.
Common problems with Boston Ferns and their solutions:
Yellowing leaves: If you notice yellowing leaves on your Boston fern, it could be a sign of underwatering or overwatering. Check the soil moisture level and adjust watering accordingly. If the soil is too dry, water more frequently. If the soil is too wet, reduce watering and ensure proper drainage.
Wilting: Wilting can be caused by underwatering or exposure to high temperatures. Check the soil moisture level and ensure that your fern is not placed in direct sunlight or near a heat source. If the soil is dry, water the plant thoroughly and mist the leaves to increase humidity.
Browning fronds: Browning fronds can be caused by several factors, including low humidity, overfertilization, or exposure to cold temperatures. Increase humidity levels by misting the leaves or placing a tray of water near the plant. Reduce fertilizer use and avoid placing the plant in drafty areas or near air conditioning vents.
Pest infestations: Common pests that can affect Boston Ferns include spider mites, mealybugs, and scale insects. Regularly inspect your plant for signs of pests, such as small webs or white cottony spots. Use a gentle insecticidal soap to treat infestations.
Disease: Boston Ferns can be susceptible to several diseases, including root rot, fungal infections, and bacterial infections.
To prevent disease, ensure proper drainage and avoid overwatering. If you notice signs of disease, such as yellowing leaves or black spots on fronds, remove affected leaves and treat with a fungicide.
By regularly inspecting and adjusting care routines, you can keep your Boston fern healthy and thriving.
Don’t be afraid to experiment with different growing conditions, such as lighting or soil types, to find the perfect balance for your plant.
Troubleshooting Boston Fern Problems

Brown crispy fronds
Usually caused by low humidity, underwatering, or dry indoor air.
Yellowing leaves
Often caused by overwatering, poor drainage, or depleted soil.
Drooping fronds
Can mean dry soil, root stress, or sudden environmental changes.
Leaf drop
Common after sudden drying, cold drafts, or low humidity.
Pale weak growth
Usually caused by low light or lack of nutrients during active growth.
Boston Fern FAQs
How often should I water Boston Fern?
Water whenever the top inch of soil starts to feel dry. Boston Ferns prefer steady moisture and should not fully dry out.
Does Boston Fern need high humidity?
Yes. Higher humidity helps keep the fronds lush and prevents brown crispy edges.
Can Boston Fern live in a bathroom?
Yes. Bathrooms with natural light are one of the best places for Boston Fern because of the humidity.
Why are my Boston Fern fronds turning brown?
This is usually caused by dry air, underwatering, or low humidity.
Can Boston Fern grow outside?
Yes, in warm humid climates or during summer in shaded outdoor spaces.
Final Thoughts: Boston Fern Care Indoors

Boston Fern is one of the most rewarding indoor ferns when you understand what it needs. Its biggest priorities are steady moisture, humidity, and protection from harsh sunlight.
If you can provide those basics, Boston Fern rewards you with lush, cascading green growth that can fill out a room beautifully. It’s especially well-suited for bathrooms, kitchens, and other naturally humid spaces.
For fern lovers looking for a classic indoor plant with a full tropical look, Boston Fern remains one of the best choices.
You can buy your Boston Fern here on Amazon