

How To Grow Cabbage Microgreens is a simple way to add fresh homegrown greens to your meals in under two weeks. They grow fast, stay compact, and have a mild cabbage flavor that works well in salads, sandwiches, and wraps.
Cabbage microgreens are part of the brassica family, which makes them closely related to broccoli, mustard, and bok choy. That means they’re beginner-friendly and easy to grow in trays with very little space.
This guide walks you through the full process, from choosing seed to harvesting fresh cabbage microgreens indoors.
🥬 What You’ll Learn
- The best cabbage varieties for microgreens
- Why coco coir works so well for brassica seeds
- How to water without mold or damping off
- When to harvest for the best flavor
- How to store cabbage microgreens after harvest
🌱 Quick Answer
To grow cabbage microgreens, sow cabbage seeds densely on moist coco coir or a grow mat, keep them lightly moist, and place them in bright light after sprouting. Most trays are ready to harvest in 10–14 days.
What Are Cabbage Microgreens?
Cabbage microgreens are the seedlings of cabbage plants that have been harvested when they are still young before the leaves begin to form.
They are cruciferous vegetables in the brassica family which contains broccoli, cauliflower, Brussels sprouts, mustard, and many other vegetables.
They typically range from 1 to 3 inches in height and have a mild flavor with hints of nuttiness. Unlike regular cabbage, microgreens can be eaten raw or cooked and will add a unique flavor to your dishes.
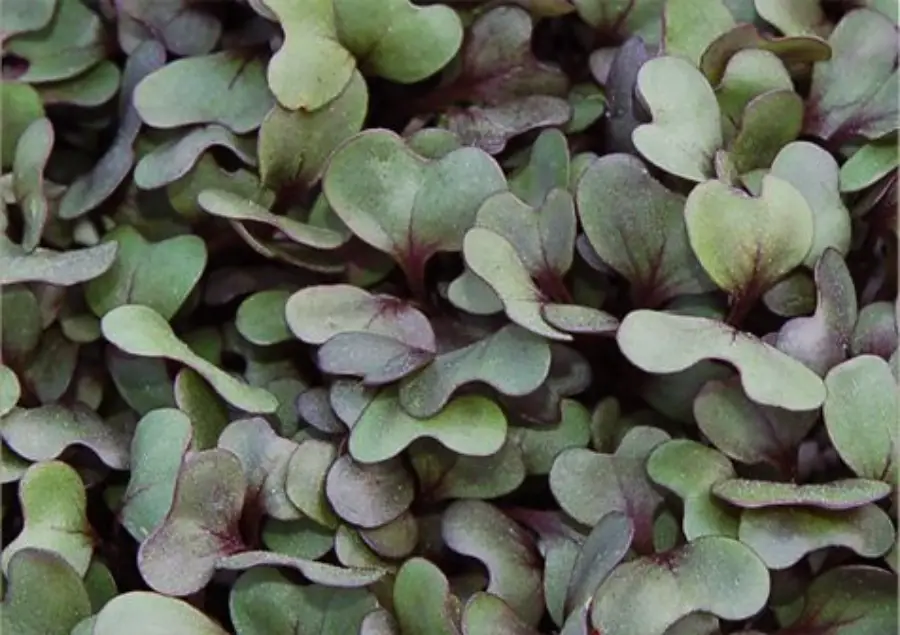
The Best Microgreen Cabbage Varieties To Grow
There are several varieties of microgreen cabbage that can be grown, each with its own flavor and nutrient profile. Some popular varieties include:
Green cabbage microgreen seeds
• Golden Acre Cabbage – This type is known for its crunchy texture and bright white color. It’s often used in salads or as a garnish.
• Green Wave Cabbage – A unique variety that features a mild, earthy flavor and tender leaves.
Red cabbage microgreen seeds
• Red Acre Cabbage – A mild-tasting variety that grows quickly and has a slightly sweet flavor.
Chinese Cabbage – This type of cabbage has a slightly spicy flavor and is usually served raw in salads or stir-fries.
• Pak Choi (pale green or dark green with white stems)
• Purple Bok Choi (purple-topped leaves with green underside)
How To Grow Cabbage Microgreens In 7 Easy Steps
So how do you grow cabbage microgreens? Just follow this step-by-step guide. You will need to gather some supplies first.
You will need cabbage seeds either red or green. You will need a growing tray and possibly a grow light if you don’t have enough natural light.
Let’s take a look at the 7 easy steps to get started growing microgreens at home:
1. Buy Your Seeds
Purchase seeds specifically meant for cabbage microgreens. You can find these online or in stores that sell gardening supplies. A good choice is red acre cabbage microgreens. I prefer red cabbage varieties for both higher nutritional value and the red color adds more pop to food. But there’s nothing wrong with growing green cabbage microgreens.

2. Get Your Planting Trays
I recommend using coconut coir as a growing medium. Fill shallow trays with a mixture of coconut coir or potting soil and perlite.
Coir is light enough for the germination process to be successful and it has excellent moisture-holding properties as well. It will give you the best results.
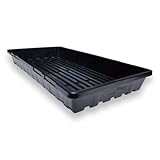
Use two trays one with drain holes and one without. Fill the top tray with drainage holes with your soil mix and then add some water to the other tray.
Then place the tray with your grow media in it into the tray with the water. You will want to bottom water your tray and then drain off any excess water. Here’s more about growing microgreens in trays.
Bootstrap Farmer makes heavy-duty 1020 trays that you can reuse over and over. Cheaper trays are not sturdy and crack easily.
For the best results, use a lightweight growing medium that holds moisture without staying soggy.
- 70% coco coir
- 30% perlite
This mix gives cabbage microgreens strong root support, clean harvests, and good airflow to reduce mold.
3. Plant Your Seeds
Don’t soak small seeds like cabbage. It makes them much harder to plant.
Spread the seeds over the top of the soil, about 1/4 inch apart. Cover them with a thin layer of soil or press them into your growing medium.
The reason you want to water from the bottom is so germinating seeds near the soil surface don’t get exposed or washed around.
4. Cover Your Seeds
Cover lightly with another layer of soil or compost. Keep your tray at room temperature and your cabbage seeds should sprout in 4-7 days.
I place an empty seed flat on top to conserve moisture but I take it off as soon as the seeds start to germinate.
Some people say to keep them in a dark place and give them a blackout period but it isn’t necessary. They don’t need dark to sprout.
Some commercial growers keep them in the dark to get longer stems since they are paid by the pound it makes sense for them to do this.
Personally, I would rather eat more green leaves and fewer stems.
5. Water Your Microgreen Seeds
Water your growing media regularly to keep the soil moist but not soggy. Be careful to give them enough water but not to overwater because this can cause root rot or mold and fungal diseases to appear.
You don’t need to bottom water often. Your baby plants will do just fine with a light misting from a spray bottle.
Don’t use cold water on your plants it can shock them so use warm water at room temperature at about 72
6. Give Them Light
Place in a warm spot that gets plenty of sunlight. Direct sunlight is fine and they should get 4-6 hours of it.
The winter months in most of the northern United States will have very low light levels. If you want to grow microgreens or any other vegetable you will need a supplemental lighting source. LED grow lights are designed to grow healthy plants and are long-lasting. You don’t have to replace bulbs and they are easy on your power bill. Here is a good light:

🏡 Best Indoor Locations for Cabbage Microgreens
Cabbage microgreens grow best in bright mild indoor spaces with good airflow.
- Kitchen windowsills: Great for small trays.
- Grow light shelves: Best for consistent year-round growing.
- Plant racks near bright windows: Good for multiple trays.
- Utility rooms with lights: Great if warm and stable.
7. Harvest Your Microgreens
Harvest the microgreens when the leaves are about 2-3 inches in height, usually within 10 to 14 days. Cut them at the soil line with scissors or a sharp knife.
They can be harvested a bit later when you see the first true leaves start to appear but they may be a bit less tender.
That’s how you grow cabbage microgreens! Now that you know how to do it, why not give it a try?
Cabbage microgreens are packed with vitamins and minerals, and they are a delicious and nutritious addition to any dish.
Red Cabbage Microgreens
Red cabbage microgreens are taking over the produce section lately as a super popular and trendy vegetable.
These tiny greens pack a huge nutritional punch, being high in antioxidant activity, vitamins A and C, folate, and phytonutrients that guard against chronic illnesses.
They bring an amazing depth of flavor to any dish or salad, from soups to tacos or sandwiches, that can’t be replicated by their larger counterparts.
Red cabbage microgreens even make for a great garnish for any plate, their bright magenta coloration providing a pop of vibrancy to ordinary dishes.
There’s nothing quite like red cabbage microgreens for adding appeal, nutrition, and flavor to your favorite meals.
They provide more nutrients than mature cabbage and take a lot less time to grow.
Is Red Cabbage Healthier Than Green Cabbage?
Red cabbage is a unique vegetable that has been gaining popularity in recent years as more people become aware of its potential health benefits.
Though not much different from its green counterpart, red cabbage contains additional compounds that may offer superior nutritional content.
Anthocyanins, which give the vegetable its signature purple hue, are thought to reduce inflammation and strengthen the immune system.
Red cabbage also has twice the antioxidants of green cabbage, which can help protect cells from damage caused by free radicals and oxidation.
While both types of cabbage are known to be great sources of Vitamin C, red varieties have up to three times more than their green counterparts.
For those looking for an extra boost in nutrition without sacrificing flavor or texture, red cabbage may be a great choice for your next meal.
Red and green cabbage are both healthy vegetables that provide a range of important nutrients.
Red cabbage tends to have more antioxidants than green cabbage, which may make it slightly healthier in terms of its ability to protect your cells from damage.
However, both types of cabbage are good sources of fiber, vitamins, and minerals, so it’s best to eat a variety of different colored fruits and vegetables to get the most benefit.
How To Store Cabbage Microgreens
While it is best to eat microgreens as soon as possible after harvest you might want to store some of your microgreens.
If you do it right they will last for a week maybe even a bit more. I often see recommendations to store them in an airtight container but this is wrong.
Microgreens need to be stored with some ventilation. Clamshells work well because they have holes. You can also use a plastic bag with holes.
Place a paper towel in your container to absorb excess moisture and help maintain humidity. Then store your microgreens in the fridge.
Here’s more about how to store microgreens.
Cabbage Microgreens Benefits
When it comes to healthy eating, there is no doubt that microgreens should be at the top of everyone’s list.
Cabbage microgreens are no exception and are packed with powerful health benefits.
Not only do they contain essential vitamins and minerals like vitamin A, C, K, and vitamin E, but a single serving can also provide an impressive amount of fiber, calcium, zinc, magnesium, and iron as well.
Additionally, cabbage microgreens have been found to act as an effective antioxidant within the body helping support skin health.
The combination of these antioxidants helps to combat against free radical damage making them a great addition for anyone looking for a little bit extra nutritional value in their diet.
🛠️ Common Problems / Troubleshooting
Mold on Soil
Usually from overwatering or poor airflow.
Leggy Growth
Needs stronger light or closer light placement.
Uneven Germination
Usually uneven moisture or seed spread.
Damping Off
Often caused by overly wet trays.
Yellow Leaves
Usually from low light or delayed harvest.
🥬 Cabbage Microgreens FAQs
How long do cabbage microgreens take to grow?
Usually 10–14 days depending on light and temperature.
Do cabbage seeds need soaking?
No. Cabbage seeds are small and grow well without soaking.
What is the best cabbage for microgreens?
Red Acre is one of the best because of its strong color and flavor.
Can I grow cabbage microgreens on coco mats?
Yes. Coco mats work very well for clean harvesting.
Do cabbage microgreens regrow after cutting?
Usually no. Most are single harvest crops.
🌿 Final Thoughts: A Fast Easy Brassica Microgreen
Cabbage microgreens are a great beginner crop if you want fast growth, mild flavor, and an easy indoor setup. They’re simple to grow and fit perfectly into small trays.
Red cabbage varieties add extra color and visual appeal, while green varieties stay classic and mild. Either way, they’re a strong addition to any indoor microgreens rotation.