
🧑🌾 Want to grow delicious, nutrient-packed greens in just days? Microgreens make it easy! You can enjoy fresh, homegrown greens indoors all year round, even in small spaces. 🌱
In this Microgreens Guide, you’ll learn simple steps to grow microgreens indoors, the best varieties to start with, and tips to keep your harvest thriving. Let’s get growing!
Microgreens Guide Key Takeaways
✅ Fast harvest: Ready to eat in 7–14 days and perfect for quick greens at home.
✅ Nutrition boost: Microgreens can contain up to 40× more nutrients than mature greens.
✅ Easy setup: Grow indoors with basic trays, soil or hydroponic mats, and a sunny window or grow light.
✅ Lighting tips: Natural light works, but LED grow lights provide optimal growth year-round.
✅ Small-space friendly: Perfect for apartment dwellers, countertop gardens, and indoor plant lovers.
How do you grow microgreens indoors? To grow microgreens indoors, sow organic seeds densely in shallow trays filled with soil or coco coir. Provide bright light, keep the growing medium moist, and harvest tender greens within 7 to 14 days once they develop their first true leaves.
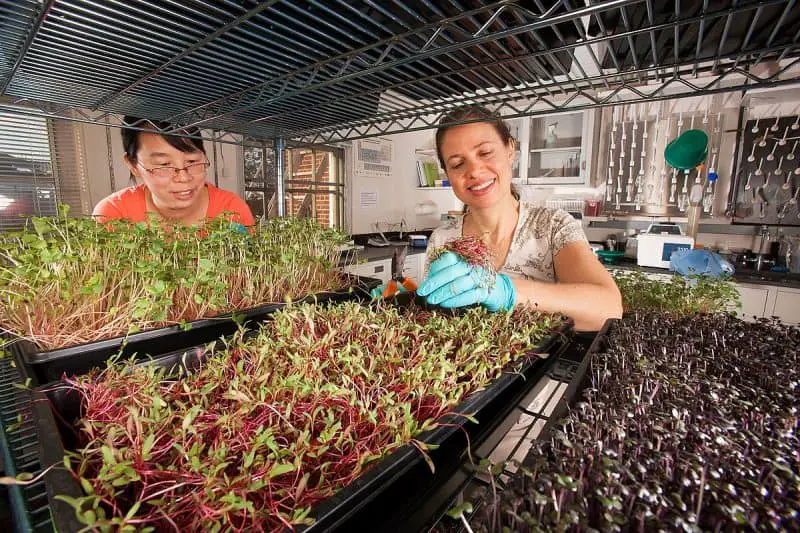
🌱 What Are Microgreens?
Microgreens are young vegetable and herb seedlings harvested when they’re just 1 to 3 inches tall, usually 7 to 14 days after germination.
These tiny greens pack a punch of fresh flavor, vibrant color, and concentrated nutrition.
Microgreens are grown for their tender leaves and stems, not the mature plant. You harvest them right after they develop their first true leaves.
They’re perfect for adding to salads, sandwiches, smoothies, and more, and they’re super easy to grow indoors!
🥗 Microgreens vs Sprouts vs Baby Greens
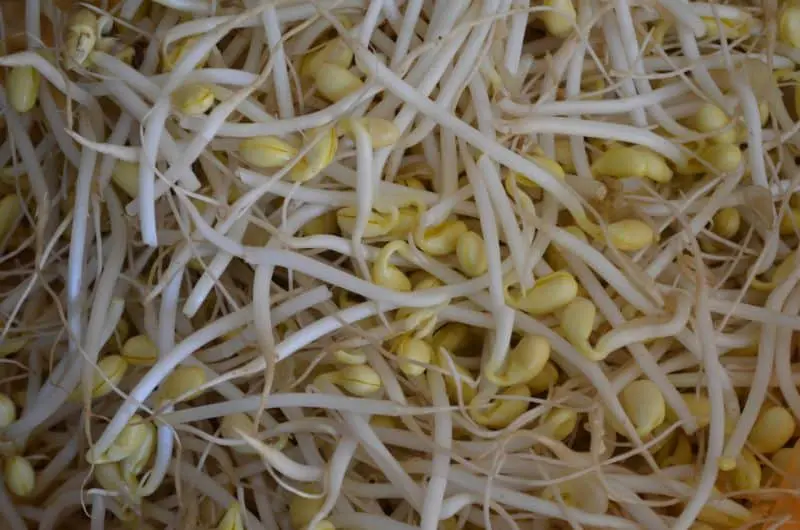
Microgreens, sprouts, and baby greens are often confused, but they are quite different in how they are grown, harvested, and used. Here is a simple comparison to help you understand the differences.
| Feature | Microgreens | Sprouts | Baby Greens |
|---|---|---|---|
| Growth Time | 7 to 14 days | 2 to 5 days | 20 to 30 days |
| Growing Medium | Soil, coco coir, grow mats | Water only (no soil) | Soil or hydroponic system |
| Part Eaten | Stem and leaves | Entire sprout including seed | Leaves and tender stems |
| Safety | Grown in air and light; lower risk | Higher risk; warm, wet conditions promote bacteria | Very low risk; same as mature greens |
| Nutrient Density | Very high | High | Moderate |
Each of these greens has its own strengths. If you want fast harvests and maximum flavor and nutrition, microgreens are an excellent choice for indoor growing.
Learn more:
Baby Greens Guide: Easy Ways to Grow Tender Greens Indoors
Are Sprouts And Microgreens The Same? 5 Differences
🥗 Health & Nutrition
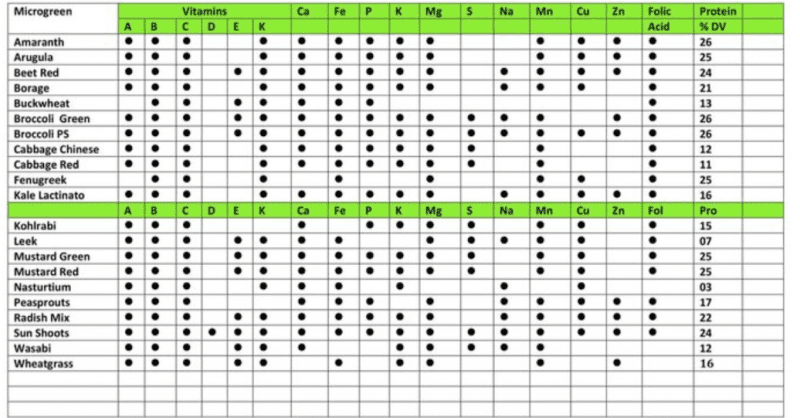
Microgreens are tiny plants with big nutritional value. Research shows that many microgreens contain up to 4 to 40 times higher levels of certain vitamins, minerals, and antioxidants compared to their mature counterparts.
This means that adding even a small handful of microgreens to your meals can provide a major nutrient boost.
Top Microgreens to Grow for Health
- Broccoli microgreens – very high in sulforaphane, a compound linked to cancer protection
- Sunflower shoots – excellent source of protein, healthy fats, and vitamin E
- Red cabbage microgreens – rich in anthocyanins, vitamin C, and compounds that support heart health
- Radish microgreens – packed with vitamin C, folate, and natural detoxifying compounds
- Pea shoots – great source of fiber, protein, and antioxidants
Incorporating a variety of microgreens into your meals helps support your immune system, heart health, and overall wellness. They are an easy and tasty way to boost your daily nutrient intake.
How Much Microgreens To Eat Per Day?
🌿 Why Grow Microgreens?
Microgreens offer big benefits in a small package. Whether you’re an indoor gardener, a food lover, or simply want more nutrition, these tiny greens deliver. Here’s why you should give them a try:
- 🥗 Nutrient-dense: Microgreens contain higher levels of vitamins, minerals, and antioxidants compared to mature plants. Many varieties offer up to four to nine times more nutrients per gram.
- ⏳ Fast harvest: Ready to harvest in just seven to fourteen days. No waiting months like with full-size crops.
- 🏡 Compact and space-efficient: Perfect for apartments and small spaces. You can grow them on a windowsill, shelf, or kitchen counter.
- 💰 Cost-effective: Store-bought microgreens are pricey. Growing your own costs just pennies per tray and you will get fresher greens.
- 🍴 Flavorful and versatile: Add peppery, mild, sweet, or earthy flavors to salads, sandwiches, wraps, soups, and smoothies.
Microgreens are one of the easiest and most rewarding indoor crops you can grow.
🌱 Essential Equipment & Setup
Getting started with microgreens is simple. You do not need fancy equipment. Here’s what you need for a successful indoor setup:
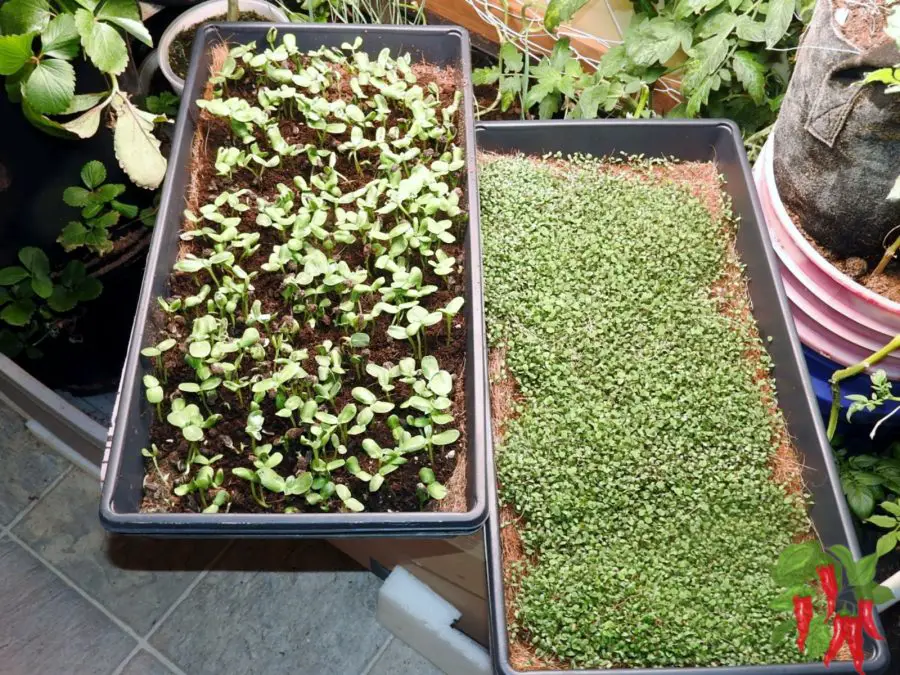
🪴 Growing Trays
- Use shallow trays about 10 x 20 inches or any recycled container.
- Trays should have drainage holes to prevent soggy roots. Use a second tray underneath to catch excess water.
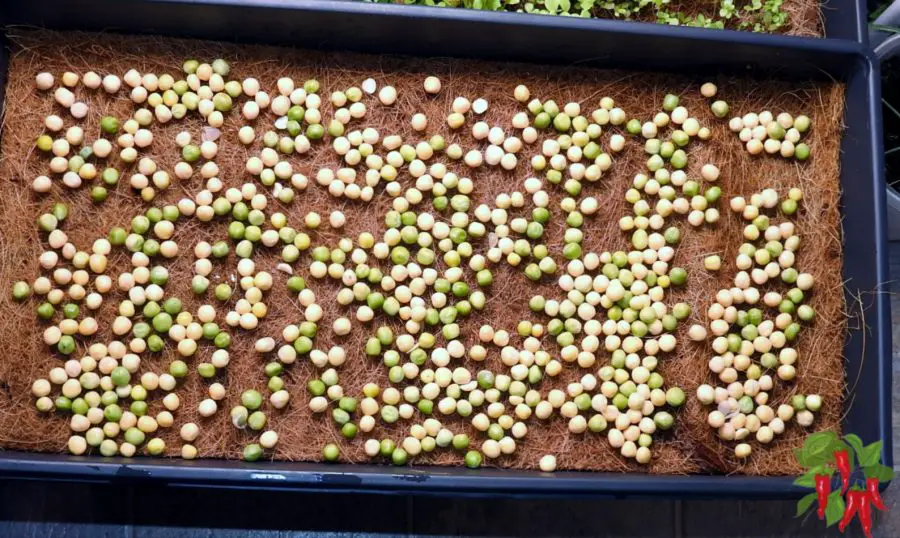
How To Grow Microgreens Indoors In Trays
🌿 Grow Media

- Soil: Light seed-starting mix works well. Avoid heavy garden soil.
- Coco coir: A sustainable option that holds moisture well. I often use coco coir myself.
- Hydroponic mats: Great for clean, soil-free growing. Coco fiber or hemp mats work well for beginners.
Read about coco coir: Coconut Coir for Microgreens
🌾 Seeds
- Use organic, untreated seeds whenever possible.
- Seed density varies, but a good rule is 1 to 2 tablespoons of small seeds (radish, broccoli) per tray. Use more for larger seeds like peas or sunflowers.
💡 Lighting Setup
Natural Light
- Microgreens need about 6 to 8 hours of bright light daily.
- Use a sunny south-facing windowsill if available.
- If light is low, rotate trays to prevent legginess.
LED Grow Lights
- LED lights provide consistent, full-spectrum light for fast growth.
- Position lights 8 to 12 inches above the trays.
- Run lights for 12 to 16 hours daily for best results. Use a timer to automate this step.
Once you have these basic supplies, you’re ready to start growing healthy microgreens indoors any time of year.
🌱 How to Plant Microgreens (Step by Step)
Planting microgreens is simple and fun. Here is an easy step-by-step process anyone can follow:
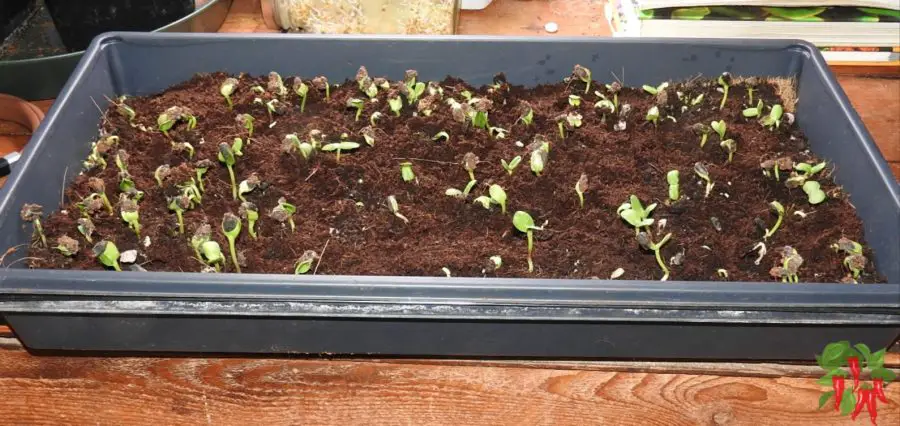
1️⃣ Prepare Your Tray
- Fill your tray with 1 to 2 inches of moist grow media (soil, coco coir, or hydro mat).
- Level the surface gently with your hand or a small board.
2️⃣ Sow the Seeds
- Evenly scatter your seeds across the entire surface. Aim for dense but not overcrowded coverage.
- Gently press seeds down with a board or your hand to ensure good contact with the grow media.
3️⃣ Mist with Water
- Use a spray bottle to lightly mist the surface until evenly moist.
- Do not overwater. The media should be damp, not soggy.
4️⃣ Cover (if needed)
- Cover the tray with another tray or a clean board to block light and encourage germination.
- Check daily and mist if needed to keep the media moist.
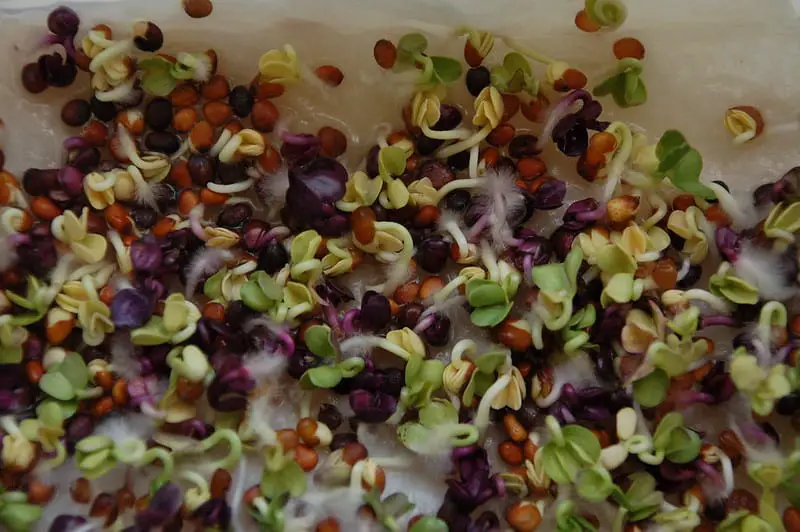
5️⃣ Germinate
- Allow seeds to germinate for 2 to 5 days, depending on the variety.
- When most seeds have sprouted, remove the cover.
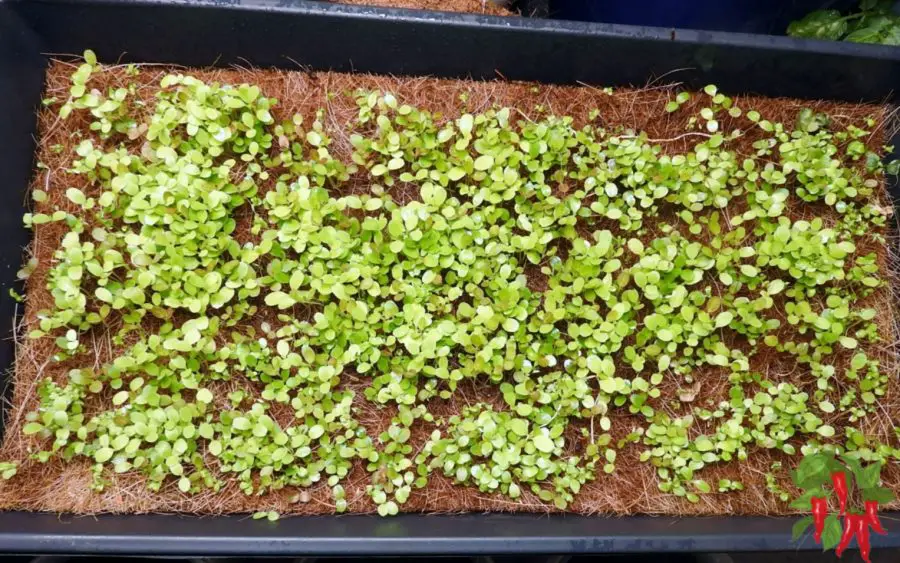
6️⃣ Grow
- Move the tray to a bright window or place under your grow light.
- Water from the bottom by adding water to the lower tray or continue misting carefully.
- Let your microgreens grow until they reach 2 to 3 inches tall or develop their first true leaves, usually in 7 to 14 days.
Once ready, it’s harvest time. We will cover that in the next section.
💡 Lighting Considerations
Lighting plays a key role in growing healthy microgreens. Here is how to get the right amount of light for strong, flavorful greens.
When Natural Light Is Enough
- Bright, direct sunlight works well for growing microgreens.
- A south-facing window that receives at least 6 hours of sunlight per day is ideal.
- If natural light is limited or inconsistent, supplement with LED grow lights for best results.
Best LED Types and Placement
- Use full-spectrum LED grow lights designed for seedlings or leafy greens.
- Position the light 6 to 12 inches above the top of your plants.
- As your microgreens grow, adjust the light height to keep it just above the canopy without causing heat stress.
Duration and Intensity for Robust Growth
- Provide 12 to 16 hours of light per day for vigorous growth.
- Use a simple outlet timer to maintain a consistent light cycle.
- Check your plants daily. If they look tall and spindly, they may need more light or closer light placement.
With the right lighting, you will grow stronger, more flavorful microgreens every time.
🛠️ Common Problems & Fixes
Even though microgreens are easy to grow, a few common problems can pop up. Here is how to spot and fix them quickly.
Mold or Damping Off
- Problem: White fuzzy mold appears on soil surface or seedlings collapse at the base.
- Fix: Improve air circulation with a small fan. Water less often and avoid overwatering. Use a clean, sterile growing tray and fresh grow media.
Root Hairs Mistaken for Fungus
- Problem: Fine white hairs appear on the root zone and are mistaken for mold.
- Fix: These are harmless root hairs and show healthy growth. No action needed.
Leggy Stems From Low Light
- Problem: Microgreens grow tall, thin, and weak with pale color.
- Fix: Increase light intensity or duration. Move plants closer to the light or add an LED grow light if using natural light alone.
Drying Out or Waterlogging
- Problem: Soil dries too quickly or stays too wet, harming roots.
- Fix: Water from the bottom when possible and monitor daily. Use a well-draining tray and grow media. Do not let trays sit in standing water.
Most microgreen problems are easy to correct with small adjustments. Regular observation is the key to success.
🌱 Growing Mini Projects
Microgreens are flexible. You do not need a big garden or fancy setup. Here are three fun ways to experiment with growing microgreens at home.
Jar Method
- Use a wide-mouth mason jar with a mesh lid or cheesecloth.
- Soak seeds overnight, then drain and rinse twice a day.
- Keep jar tilted to drain excess water and allow airflow.
- Harvest in about a week. Great for sprout-style microgreens.
Paper Towel Method
- Line a shallow tray with several layers of damp paper towels.
- Sow seeds evenly on top of the paper towel layer.
- Mist lightly and cover tray until seeds germinate.
- Keep moist and place in a bright spot once sprouted.
- Harvest when ready. Best for fast-growing varieties like radish and mustard.
Hydroponic Tray
- Use a tray fitted with a grow mat (coco fiber or hemp works well).
- Moisten the mat, sow seeds densely, and mist lightly.
- Cover tray for 2–3 days to promote germination.
- Once sprouted, uncover and provide light. Water from below to keep mat moist.
- Harvest in 7–14 days. A tidy, soil-free option.
These easy projects are perfect for testing new varieties or getting started with limited space. They also make great educational activities for kids.
🌾 When & How to Harvest
Harvesting microgreens is simple and rewarding. The key is knowing the right time to cut them and how to handle your fresh greens for the best flavor and nutrition.
Harvest Timing
- Most microgreens are ready to harvest in 7 to 14 days after sowing.
- The best time to cut is when plants have fully opened cotyledon leaves and may just be starting to grow their first true leaves.
- For the freshest taste, harvest in the morning when plants are hydrated and crisp.
How to Cut and Yield Expectations
- Use sharp scissors or a clean knife to cut stems just above the soil or grow mat surface.
- Hold the greens gently to avoid bruising them during harvest.
- One standard 10 x 20 inch tray of microgreens can yield about 4 to 8 ounces, depending on the variety and density.
Will Microgreens Regrow?
- In most cases, microgreens will not regrow after cutting. Once the main stem is severed, the plant is finished.
- Some exceptions include pea shoots and certain beans. If a node and some stem remain, these can sometimes regrow new shoots for a second harvest.
- For ongoing harvests, sow new trays every 1 to 2 weeks to maintain a steady supply.
Do Microgreens Grow Back? What No One Tells You
Harvesting microgreens at the peak of flavor gives you the best eating experience. Enjoy your homegrown greens fresh in meals or store them carefully for later use.
Learn more: How To Store Microgreens (Maximize Your Harvest!)
🌱 Microgreens in Low-Light & Indoor Spaces
Not every home has bright south-facing windows, but that doesn’t mean you can’t grow microgreens indoors. Many varieties are well suited to lower light conditions and can thrive with just a little help.
Best Low-Light Microgreens
- Pea shoots
- Sunflower shoots
- Radish microgreens
- Broccoli microgreens
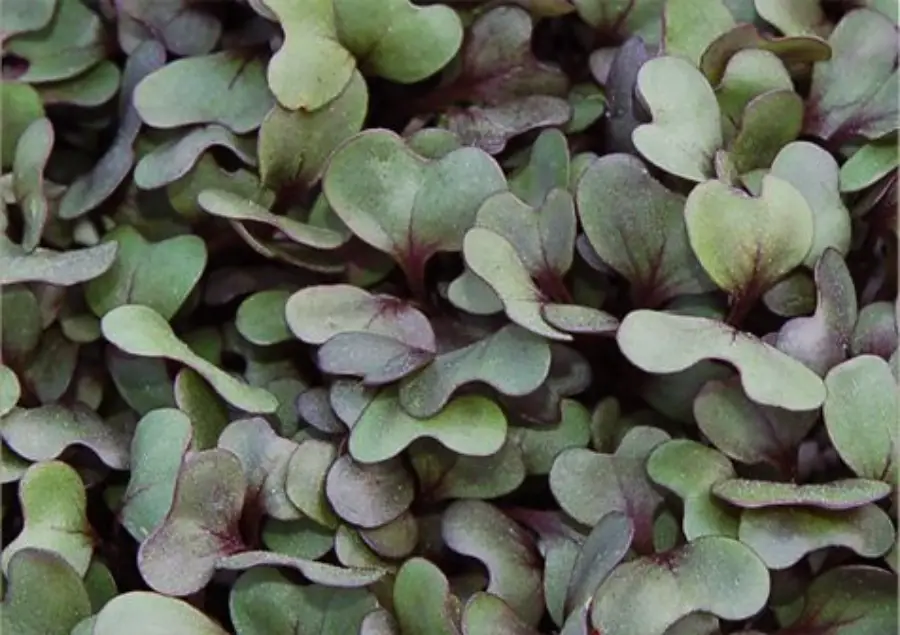
- Kale microgreens
- Mustard microgreens
Tips for Growing in Shady Kitchens or Windowsills
- Place trays near the brightest window you have, ideally east or west facing.
- Rotate trays daily so all sides get exposure to available light.
- Supplement with an affordable LED grow light if natural light is limited.
- Choose faster-growing varieties that don’t require long grow times.
- Keep trays uncovered once germination begins to encourage stronger stems.
With the right varieties and a few simple adjustments, you can successfully grow fresh, tasty microgreens in nearly any indoor space, even a shaded kitchen.
❓ Microgreens FAQs
Microgreens are a fun and rewarding crop to grow indoors. Here are some common questions to help you get started and grow with confidence:
Q. What is the difference between microgreens and sprouts?
A. Microgreens and sprouts are different stages of plant growth. Sprouts are germinated seeds harvested within 2–3 days. Microgreens are young plants harvested after they develop their first true leaves, usually within 7–14 days. Microgreens grow in soil or a soil substitute and need light.
Q. What are the health benefits of microgreens?
A. Microgreens are rich in antioxidants, vitamins, and minerals. They may help support heart health, reduce blood pressure, improve gut health, and even offer cancer-fighting benefits when consumed as part of a healthy diet.
Q. How do you grow microgreens indoors?
A. You’ll need a shallow tray, some soil or growing media, organic microgreen seeds, and a sunny windowsill or grow light. Scatter the seeds, mist with water, and keep moist while they grow. Harvest in about 1–2 weeks.
Q. How should you store microgreens after harvesting?
A. Rinse and dry your harvested microgreens thoroughly. Store them in a ventilated container with a paper towel to maintain humidity. Keep in the refrigerator and use within a week or two.
Q. What’s the best variety for beginners?
A. Radish microgreens are one of the easiest and fastest to grow, making them perfect for beginners. Pea shoots and sunflower shoots are also very beginner-friendly and produce a great harvest.
Q. Can I grow microgreens without sunlight?
A. Yes, you can grow microgreens indoors using LED grow lights. Most microgreens need at least 12–16 hours of light per day for healthy growth. A good full-spectrum grow light can easily replace natural sunlight.
🌿 Final Thoughts on Growing Microgreens Indoors
Growing microgreens indoors is one of the easiest and most satisfying ways to add fresh, nutrient-packed greens to your meals.
With just a tray, some seeds, and a little light, you can enjoy delicious microgreens all year long. No garden required!
If you’re new to indoor gardening, microgreens are a great place to start. They grow fast, require minimal space, and offer big rewards in both flavor and nutrition. 🌱
Looking for detailed articles on growing microgreens?
Check out my MICROGREENS Category
📚 Guides
Looking for more tips and ideas? 🌿 Explore these helpful guides for even more ways to grow indoors and out:
🌿 Explore More Gardening Guides
Explore More Indoor Growing Ideas 🌱
If you enjoy growing fast, fresh greens indoors, try these other indoor gardening categories:
Happy growing! 🌱🥗
📚 References
- Wikipedia – Microgreen
- Penn State Extension – Growing Microgreens at Home
- Healthline – Microgreens: Nutrition, Benefits & How to Grow Them
- Journal of Agricultural and Food Chemistry – Assessment of Vitamin and Carotenoid Concentrations in Microgreens