
Want a fast, colorful crop you can grow right on your windowsill? Amaranth microgreens are a gorgeous deep red, packed with nutrients, and ready to harvest in about two weeks.
Even if you’re new to microgreens, you can grow them indoors with a simple tray, light, and a warm spot.
In this guide, I’ll walk you through exactly how to grow amaranth microgreens indoors in 7 easy steps, plus how to avoid mold, boost color, and use your harvest in everyday meals.
What You’ll Learn 🌱
- 🌈 Why amaranth microgreens are worth growing (and how they differ from the green “pigweed” version).
- 🧺 The simple supplies you need for a compact indoor setup.
- 📋 A quick 7-step overview you can skim before you start.
- 💡 How to dial in light, warmth, and watering to avoid mold and weak, leggy growth.
- 🍽️ Easy ways to harvest, store, and use your red amaranth microgreens in everyday meals.
What Is Amaranth (and Why Grow It as Microgreens)?
Amaranth is an ancient crop that’s been grown for thousands of years as both a grain and a leafy green.
Today you’ll still see it in traditional dishes around the world, and more recently it’s become popular as a nutrient-dense microgreen.
As microgreens, amaranth is grown just long enough to form a short, colorful canopy of baby shoots. You harvest and eat the stems and leaves while the plant is still young and tender.
- 🌿 Flavor: Mild, a little like spinach with a subtle earthy sweetness.
- 💪 Nutrition: Naturally rich in vitamins, minerals, and plant compounds with antioxidant activity.
- 🏡 Perfect for indoors: Grows in shallow trays and doesn’t need much space, so it’s ideal for apartments and small kitchens.
Red vs. Green Amaranth Microgreens
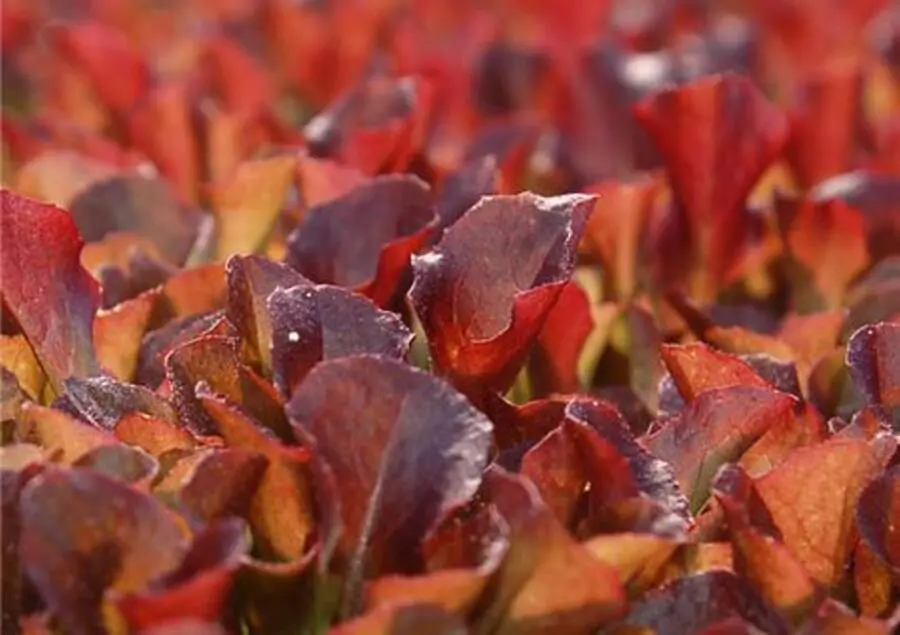
You’ll see both red and green amaranth out there, but for microgreens, red varieties usually steal the show.
- ❤️ Red amaranth: Deep red or magenta stems and leaves that look beautiful in salads, on avocado toast, or as a garnish. Often bred specifically for color and food use.
- 💚 Green amaranth: Commonly known as pigweed in farm fields, but also grown as “Chinese spinach” in some cuisines. Tasty, but not nearly as dramatic visually.
For microgreens, I recommend a red variety such as Red Garnet or similar. You’ll get that bright, “wow” factor plus great flavor and nutrition in a tiny space.
Supplies You’ll Need 🧰
You don’t need a fancy setup to grow amaranth microgreens. Here’s what to gather before you start:
- 🌱 Amaranth microgreen seeds (preferably a red variety).
- 🪴 Two shallow trays: one with drainage holes nested inside one without holes for easy bottom watering.
- 🧱 Growing medium: fine-textured potting mix or coco coir; you can lighten heavier mixes with a bit of perlite.
- 💧 Water: Tap water is usually fine; filtered or RO if your water is very hard or heavily treated.
- 💡 Light source: a bright, sunny window or an LED grow light.
- 🌫️ Mister or spray bottle for gentle watering during germination.
- 🌬️ Optional: a small fan on low to improve airflow and reduce mold risk.

Ideal Growing Conditions for Amaranth Microgreens
- 🌡️ Temperature: Warm is best. Aim for roughly mid-60s to mid-70s °F indoors.
- 💡 Light: Bright, indirect light or 12–16 hours daily under grow lights for strong color and sturdy stems.
- 💦 Moisture: Keep the medium evenly moist, never waterlogged. Amaranth has fine roots and dislikes soggy conditions.
- 🌬️ Airflow: Gentle airflow helps prevent mold on densely sown trays.
Quick 7-Step Overview 🌱
Short on time? Here’s the whole process at a glance:
- 🧺 Fill your tray with moist coco coir or potting mix.
- 🌾 Scatter amaranth seeds thickly and evenly over the surface.
- 🌫️ Mist the seeds, then cover or stack trays to keep them dark and humid while they sprout.
- 💡 Uncover when most seeds have germinated and move the tray to bright light.
- 🚿 Switch to bottom watering: add water to the bottom tray and let the roots drink.
- 👀 Grow until the shoots reach about 2–3 inches and show their first true leaves.
- ✂️ Harvest with clean scissors, rinse gently, and enjoy fresh or chilled.
Detailed Step-by-Step Instructions
Step 1: Prepare Your Trays & Growing Medium
Place the tray with drainage holes inside the solid tray. Fill the top tray with 1–1.5 inches of your growing medium and level it with your hand or a small board.
Moisten the medium thoroughly. It should feel evenly damp but not muddy—when you squeeze a handful, it should hold together without dripping.
Step 2: Sow Amaranth Seeds Generously
Amaranth seeds are tiny, so don’t be shy about sowing.
- 🌾 Sprinkle them evenly over the surface, aiming for a dense but single layer of seeds.
- 🖐️ Gently press the seeds into the surface so they make good contact with the moist medium.
You can leave amaranth seeds uncovered or add a very thin dusting of medium on top. The key is not to bury them deeply.
Step 3: Mist and Cover for Germination
Use your mister to lightly spray the seeds until the surface is evenly moist.
- 🌫️ Cover the tray with a humidity dome, another empty tray, or plastic wrap with a few holes.
- 🌙 Keep the tray in a warm, dark spot while the seeds sprout.
Check once or twice a day. If the surface starts drying out, give it another light mist. You’re aiming for steady moisture, not constant puddles.
Step 4: Move Sprouts Into the Light
Once most of the seeds have germinated and you see a fuzzy carpet of pale shoots, it’s time to uncover the tray and move it into the light.
- 💡 Place the tray under LED grow lights or in a bright window.
- 🔄 Rotate the tray daily if light is coming from one side so the stems grow upright instead of leaning.
As the shoots green up and then deepen into red, you’ll know they’re getting enough light.
🌟 Remember you need access to sunlight, LED grow lights, or fluorescent light bulbs to grow microgreens indoors.
")
Step 5: Switch to Bottom Watering
To avoid splashing soil onto the leaves and to reduce mold, switch from misting the tops to watering from below.
- 🚿 Pour a small amount of water into the bottom tray.
- ⏱️ Let the tray sit for about 15–20 minutes so the medium can wick up moisture.
- 🪣 Pour off any excess so the roots aren’t sitting in standing water.
Water again only when the tray feels noticeably lighter and the top of the medium starts to look dry.
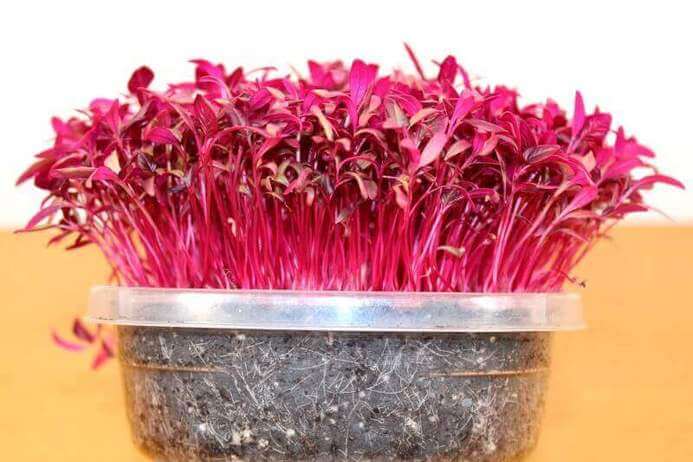
Step 6: Grow On Until 2–3 Inches Tall
Amaranth microgreens usually take about 10–15 days from sowing to harvest, depending on temperature and light.
- 📏 Aim to harvest when the shoots are roughly 2–3 inches tall.
- 🍃 Look for the first set of true leaves above the seed leaves (cotyledons).
If the stems look very thin and pale, they’re probably craving more light. If the tray looks droopy or dried out, check your watering routine.
Step 7: Harvest, Rinse & Enjoy
When your amaranth microgreens reach harvest size, it’s time for the fun part.
- ✂️ Use clean scissors or a sharp knife to cut the stems just above the soil line.
- 🚰 Rinse gently in cool water to remove any stray bits of medium, then dry on a clean towel or in a salad spinner lined with paper towel.
- ❄️ Store in an airtight container in the fridge and use within about a week for best quality.
Common Problems & Easy Fixes
- 😕 Problem: Mold on the soil surface.
👉 Fix: Improve airflow with a small fan, avoid overwatering, and don’t keep the tray sealed once most seeds have sprouted. - 🌥️ Problem: Pale, weak, leggy stems.
👉 Fix: Move the tray closer to the light or switch to a stronger grow light. Make sure they get 12–16 hours of bright light daily. - 🥵 Problem: Microgreens drying out too fast.
👉 Fix: Check moisture more often, especially in warm rooms. Add water to the bottom tray before the medium completely dries.
How to Use Amaranth Microgreens in the Kitchen 🍽️
These bright red greens are more than just pretty. They add a gentle, earthy flavor and a nice nutrient boost to simple meals.
- 🥗 Toss a handful into salads just before serving.
- 🍞 Use as a colorful topping for avocado toast, grain bowls, or roasted veggies.
- 🥪 Add to sandwiches and wraps in place of lettuce.
- 🥣 Sprinkle on soups, omelets, or scrambled eggs right at the end for a fresh pop of color.
- 🧄 Blend into pesto or green sauces for an earthy, mild base note.
Amaranth Microgreens Nutrition Highlights
Exact values vary by variety and growing conditions, but in general amaranth microgreens:
- 💪 Provide plant-based protein and dietary fiber.
- 🧲 Supply minerals such as iron, calcium, and magnesium.
- 🛡️ Contain plant compounds with antioxidant activity that support overall wellness as part of a balanced diet.
Like any food, they’re not a magic cure, but they’re a tasty way to work more nutrient-dense greens into your everyday meals.
Growing Amaranth Microgreens FAQ
What do amaranth microgreens taste like?
They have a mild, leafy flavor that’s similar to spinach with a hint of earthiness and subtle sweetness. They’re gentle enough to use raw in salads and on sandwiches.
How long does it take to grow amaranth microgreens?
Most trays are ready to harvest in about 10–15 days from sowing, depending on temperature and light. Warmer temps and strong light usually speed things up.
Do I need grow lights to grow amaranth microgreens indoors?
You can grow them in a bright, sunny window, but a simple LED grow light gives more consistent results, especially in winter or in rooms with limited natural light.
How do I keep amaranth microgreens from getting moldy?
Sow densely but not in clumps, water from below once they’ve sprouted, avoid soggy media, and use gentle airflow. Also, remove any humidity dome once most seeds have germinated.
How long do harvested amaranth microgreens keep in the fridge?
If you harvest, rinse, and dry them gently, then store them in an airtight container, they usually keep good texture and flavor for about 5–7 days.
Amaranth Microgreens Final Thoughts

Growing amaranth microgreens indoors is an easy way to add fresh color and nutrition to your meals. With just a warm spot, steady light, and simple watering, you can harvest vibrant red shoots in about two weeks. Start a tray today—you’ll be enjoying your own homegrown microgreens before you know it.
How To Grow Amaranth Microgreens
• Prepare the soil or coco coir, ensuring it’s moist but not soggy.
• Spread the seeds evenly across the soil, covering them lightly with soil.
• Mist the soil with water to keep it moist.
• Place the trays in a sunny spot or under grow lights for 6-8 hours (or 12-18 hours under grow lights) daily.
• Maintain moisture by lightly misting the soil as needed.
• Harvest the microgreens in about 10-15 days, when they reach 3-4 inches in height.
🌟 Microgreens Guide: Grow Fresh Microgreens Indoors